2D
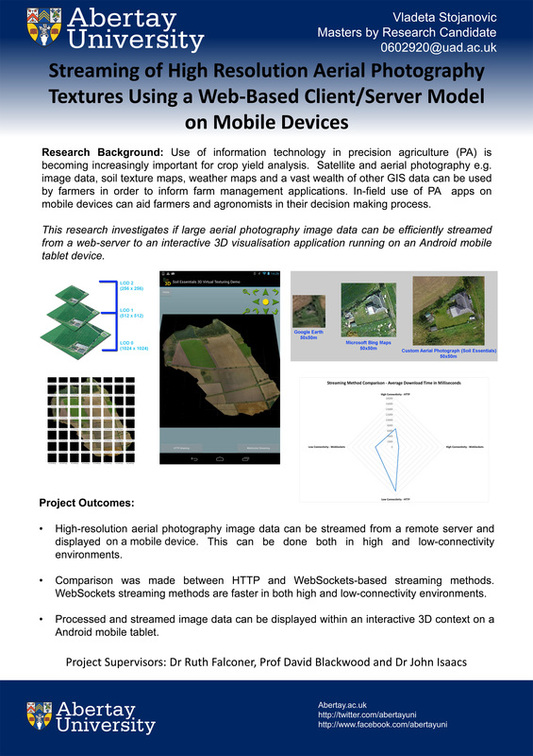
OpenGL/GLUT Asteroids (2011)
A little asteroids game I made in my spare time. You can download the bin + src if you are curious.
Source Code (C++)
Exe (Win32)
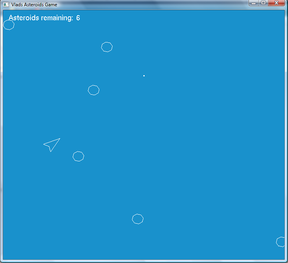
OpenGL/GLUT 2D Bezier Curve Shape Generation (2011)
Another little program I coded in my spare time that infinitely generates closed spline shapes using three
different cubic Bezier curves. The curves themselves are interpolated using De Casteljau's algorithm (a very good reference on how to implement it can be found here: http://www.cubic.org/docs/bezier.htm).
Src + bin is available for download.
Exe (Win32)
OpenGL/GLUT 2D Bezier Curve Shape Generation (2011)
Another little program I coded in my spare time that infinitely generates closed spline shapes using three
different cubic Bezier curves. The curves themselves are interpolated using De Casteljau's algorithm (a very good reference on how to implement it can be found here: http://www.cubic.org/docs/bezier.htm).
Src + bin is available for download.
GBA Pong (2009)
A blast from the past. This was the first "proper" game I made during the second semester of my first year at university (back in 2009). I don't usually post old projects (I have many), but this one made the cut because you simply can't have a 2D games section on your website without having at least one Pong clone. You need VisualHAM to compile the code and a GBA emulator to run the generated ROM file.
A blast from the past. This was the first "proper" game I made during the second semester of my first year at university (back in 2009). I don't usually post old projects (I have many), but this one made the cut because you simply can't have a 2D games section on your website without having at least one Pong clone. You need VisualHAM to compile the code and a GBA emulator to run the generated ROM file.

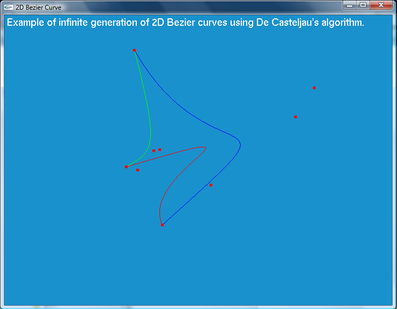
ActionScript 3.0 Breakout (2012)
This is the source code and the .swf of the Breakout game featured on my "About" front page. I made this in my own time as a programming exercise. Makes use of the Flex 4.6 API. This version also has simple sound effect playback.
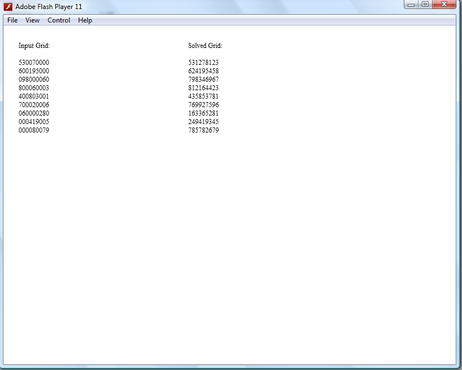
ActionScript 3.0 Sudoku Solver (2012)
Another programming exercise I did in my own time. This is a simple sudoku solver that can solve three 3x3 sudoku grids of varying complexities using a brute force algorithm (hacked together from various online sources and examples, see commented code section). The program reads in a text JSON numbers array data file, computes the results, displays the results and saves the results in a compatible JSON numbers array data file. In order to save the computed data, make sure you run .swf from a stand-alone Flash player application (available from the Adobe website).
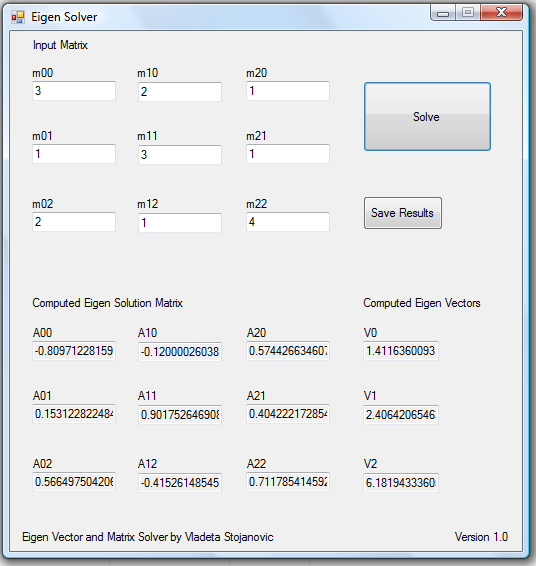
Eigen Solver (2012)
This is a small utility program I wrote in C# using .Net 4.0. It computes the Eigen vector and the Eigen matrix values for a symmetrical 3x3 input matrix. It can also output the results as a formatted text file. Useful if you need to quickly calculate things such as inertia tensors. The core computation code is based on the public domain Java Matrix library JAMA (and the C version of the core computation routines can be found here: http://barnesc.blogspot.co.uk/2007/02/eigenvectors-of-3x3-symmetric-matrix.html).
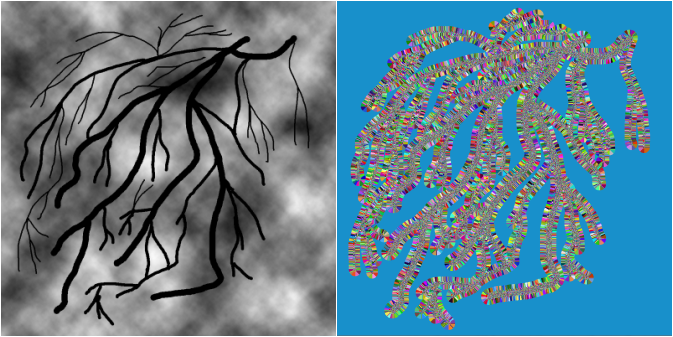
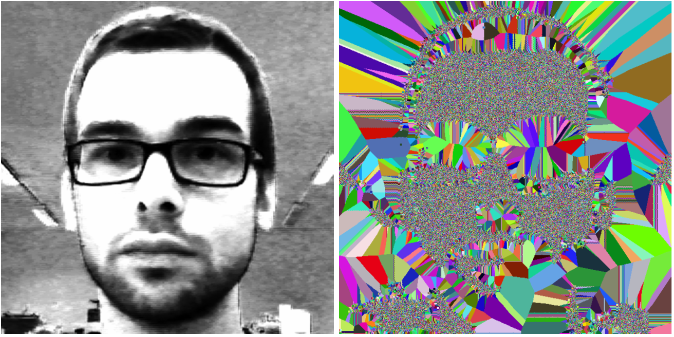
2D Voronoi Topology Rendering (OpenGL/GLUT) (2012)
This is a small demo program I wrote in order to investigate the generation of Voronoi topology maps in 2D. I became interested in Voronoi based topology rendering after doing some research concerning area approximations of GIS DEM data (such as height maps). During my investigation, I found that Voronoi topology rendering is used widely in many scientific, medical and geographical visualisation scenarios. One such interesting implementation of Voronoi topology computation is described by [Zeki 2006]:
http://faculty.ksu.edu.sa/72005/Papers%20of%20Interest%20Remote%20Sensing/Representation%20of%20Water%20Resources%20in%20Satellite%20Images.pdf
I then decided to write a small example 2D Voronoi rendering application using OpenGL/GLUT, that could compute Voronoi topology maps from absolute value (binary colour coding) and ranged value grayscale (8bit colour coding) image maps. Such maps may either be height maps or any other topology representations of interest. I also came across a very simple 2D Voronoi OpenGL rendering demo written by Nate Robins (https://user.xmission.com/~nate/sgi.html), that made use of z-buffer based conic intersection rendering, often referred to as Hoff’s algorithm. Based on this, I developed the following application that can read in either 8-bit RAW or standard Bitmap image files and compute 2D Voronoi topologies for selected absolute or ranged colour value areas based on the inputted image. Additionally, the stepping size for the resolution of the binary image Voronoi topology can be adjusted.
It should be noted that I used somewhat a “brute-force” approach to do all this, as all the computation is done on the CPU. Currently, for a 996x996 sample render, it takes 353.758 seconds (about 6 minutes on a Quad Core Intel Q9000 2GHz CPU) to compute the Voronoi topology regions for 61712 sampled points. I'm currently implementing a DirectCompute version of the program using DirectX11 that I hope to release in the near future. In the mean time, you can also read more about the principals of geometric computing from these excellent lecture slides: http://www.cs.princeton.edu/~rs/AlgsDS07/16Geometric.pdf
3D
Old-skool OpenGL 1.2 Demo (2010)
2nd year university graphics programming module project. One my earliest OpenGL demos. The boiler plate/ framework is based on the over-used NeHe and GameTutorials LLC code. This small program demonstrates real time hardware- accelerated terrain lighting (using the old-skool fixed function T&L pipeline), using the Mean Weighed Equally (MWE - see http://www.gamedev.net/reference/articles/article2264.asp normals calculation algorithm in order to achieve Gouraud shading for the terrain model. The terrain model is generated from a 8-bit RAW data heightmap file. The demo also shows rendering of static MS3D (MilkShape 3D) models.
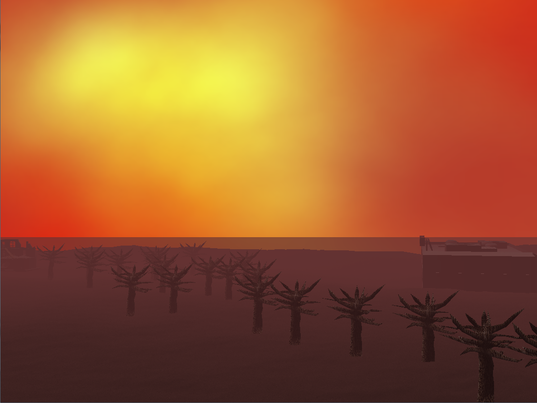
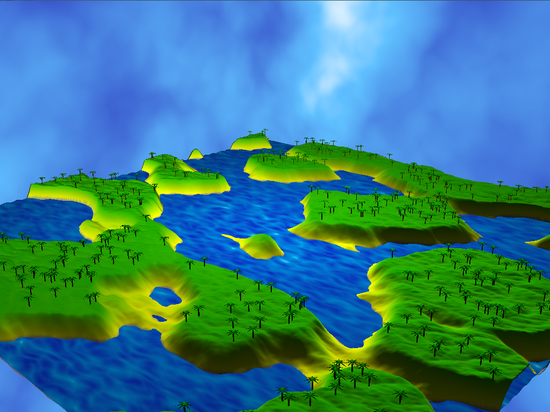
OpenGL 3.3. Procedural Island Generator (2011)
This is my 3rd year procedural graphics programming and modeling coursework. The application makes use of libNoise (http://libnoise.sourceforge.net/) to generate small islands populated by palm trees. All of the content is procedurally generated. The application also makes use of GLSL for the implementation of the terrain Phong per-pixel lighting and shading model, as well as the vertex animation of the water mesh. The program makes use of the OpenGL 3.3/GLSL framework (window and rendering context creation) that was provided by our lecturer, while the procedural generation, rendering and scene navigation code was designed and implemented by me.
Source code (note you will need Glew, libNoise and GLTools from the OpenGL Blue Book - 5th Edition)
Bin + Report
Bin + Report
OpenGL 3D Bezier Curve Demo (2011)
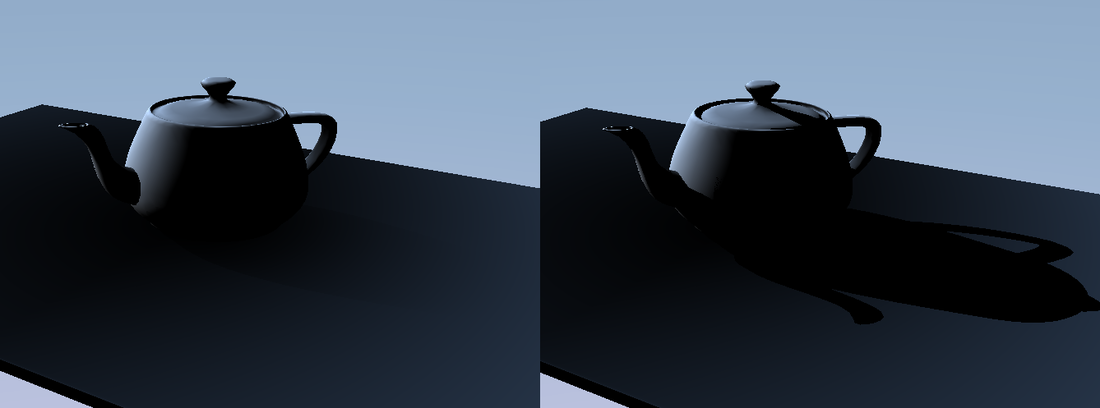
This OpenGL 3D demo application was developed for my 4th year Applied Mathematics module. The demo was developed using OpenGL 1.2 and GLUT 3.7 (very old-skool, I know). The application demonstrates the generation and rendering of 3D Bezier curves, using De Casteljau’s Algorithm. The other important feature of the 3D Bezier demo is the application of linear velocity change (only for the default curve though), used to simulate roller coaster motion of the teapot object as it moves along the generated curves. This is done by decrementing the stepping speed of the spline point interpolation by simulating the conservation of potential energy of the object as it moves against a higher gradient slope on the sampled curve point (you can read more about this in the report provided in the download link below).
DirectX 9.0c 3D Demo Scene (2011)
This demo is a simple DirectX 9 scene (making use of Direct3D along with HLSL). The scene features diffuse, normal and environment cube mapping, with per-pixel lighting (using the Phong shading model), and also features the loading of static .X file meshes. The shaders were written with HLSL and make use of the version 2.0 shader specification. The application was developed from a personal framework that was based heavily on the code examples from the book “Introduction to 3D game programming with DirectX 9.0c: A Shader Based Approach”, by Frank D. Luna. The application was developed as part of my 3rd year graphics programming module.
Tranisitions Prototype - 3rd Year Group Project (2011)
The Transitions prototype is an educational 3D platformer style game, developed using Unity 3D, where the player has to interact with other characters, using an attribute based conversation response system. The aim of the game is for the player to find their characters lost schoolbag. In order to locate their lost schoolbag, the players have to interact with the other characters in the game, and the responses the player obtains from the characters are based on their characters assigned attributes. The players can also play a few educational mini-games, which cover very basic foundation elements from primary education chemistry and mathematics.
The prototype was developed by a team of six individuals (including myself), from September 2010 to May 2011. I was the lead programmer and technical designer on the team. I was responsible for coming up with the technical design document, developing and testing the core gameplay code (character control, camera control, animation control, AI routines, level scripting, etc), as well as doing additional 3D artwork and animations. You can download the executable of the prototype from the link provided below.
The prototype was developed by a team of six individuals (including myself), from September 2010 to May 2011. I was the lead programmer and technical designer on the team. I was responsible for coming up with the technical design document, developing and testing the core gameplay code (character control, camera control, animation control, AI routines, level scripting, etc), as well as doing additional 3D artwork and animations. You can download the executable of the prototype from the link provided below.
Snowman Prototype (2010)
The Snowman Prototype is a small game demo made using Unity3D.The game was developed over a period of about eight weeks (from mid-June to mid-August 2010). The setting of the game is based on the novels Oryx and Crake and its sequel, the Year of the Flood, by Margaret Atwood. The prototype was developed by a team of three people, which included a programmer & technical designer (me), an artist and the main designer.
The game was programmed mainly using JavaScript, with some game logic components programmed in C#. I was responsible for developing and implementing the technical design, which included the design, implementation and testing of all of the gameplay mechanics, physics and rendering components. I was also responsible for animating all of the 3D character models. The visual style of the game makes extensive use of cel-shading (aka Toon shading), using Unity 3D's powerful built in material editor (and "off the shelf" shaders). This gives the game a unique "cartoonish" look. You can download and play the prototype from the link below.
The game was programmed mainly using JavaScript, with some game logic components programmed in C#. I was responsible for developing and implementing the technical design, which included the design, implementation and testing of all of the gameplay mechanics, physics and rendering components. I was also responsible for animating all of the 3D character models. The visual style of the game makes extensive use of cel-shading (aka Toon shading), using Unity 3D's powerful built in material editor (and "off the shelf" shaders). This gives the game a unique "cartoonish" look. You can download and play the prototype from the link below.
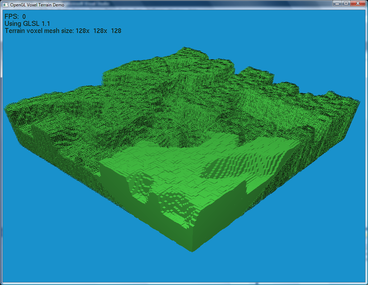
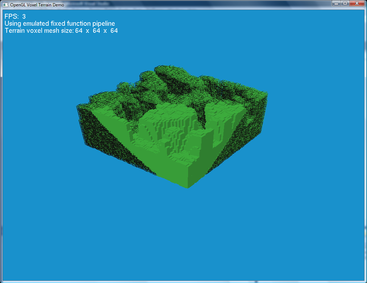
OpenGL 2.0 VBO Direct Volume Rendering and Frustum Culling (2012)
This is a small personal 3D demo that I had the intention of making into a Mincecraft clone.
However, I decided to use this to instead experiment with different frustum rendering and pipeline emulation capabilities of OpenGL 2.0 (specifically when dealing with large amount of VBO data streaming and processing). The demo makes use of libNoise and allows the user to generate new terrains of sizes varying from 8x8x8 to 128x128x128. This is essentially a form of un-optimized direct volume rendering, where all of the “chunks” of the terrain model are rendered. However, a frustum space checking algorithm is included which allows the user to observe the effects of frame-rate performance as various parts of the terrain model come in and out of view. The frustum rendering model makes use of two routines. The first routine creates a cube frustum based on the inherited view projection matrix camera coordinates. The second frustum routine checks the collision between the current camera position and the current position of the chunks that are rendered in the main frustum, before rendering only the chunks that are both in the main frustum and within the collision space (based on the set radix size used for the camera/chunk collision) of the users camera. I would want to expand this project further at some point, but for now I’m just releasing it into the public domain.
Use keys 1-5 to generate new terrains, use WASD and the mouse to move around, and use the V key to toggle wireframe rendering of VBO data that fails the frustum testing routines.
|
|
XNA 4.0 City Environment Car Driving Sim (2012)
This is another experimental demo I made out of amusement, focusing on visualising complex game environments in real time. One of the main things I wanted to investigate with this demo was a simple method of implementing collision detection within a complex game environment (such as a city), for medium to fast paced gameplay (such as in a driving/racing simulation, with a little bit of inspiration from the GTA games). The solution to this was achieved by using XNA’s bounding sphere collision detection routines. This method works fairly well and is fairly fast to compute in real time, even for large static game environments. I have had previous experience before using AABB’s (Axis-Aligned Bounding Boxes) and having to convert them to OOB (Object Oriented Boxes) for my 4ht year university honours project, and I have found that the computation for the minimum and maximum bounding box values to be very expensive, especially when converting AABB’s to OOB’s in real time for dynamic objects.
Other few interesting things about this demo:
- The demo was developed based on the XNA framework I developed for my 4th years honours project.
- The car model is rendered using a standard per-pixel Phong shading model, while the city model is rendered with a single pass diffuse shader taking into account one directional ambient light (the global scene light).
- The edge detection filtering is implemented via a post-processing interface, and makes use of the Sobel edge detection algorithm (a good example can be found here: http://brooknovak.wordpress.com/2008/09/16/simple-image-filters-written-as-hlsl-pixel-shaders/
- The car “shadow” is rendered as by obscuring the projection matrix of the car model (essentially flattening the car model) and projecting it. For more info, see here:
http://www.xbdev.net/shaderx/fx/index.php
- The camera control is based on the velocity of the car (aka velocity based camera control), allowing it change views and angles while following the car.
- The car control is based on the tutorial I read on here: http://www.codeproject.com/Articles/29323/Driving-Simulation-in-XNA,
I re-wrote much of the car control in order to include 4 different speeds, reversing speed, breaking and transition from one speed to the next. This is based on the vector calculation of the current acceleration scalar value that is added onto the linear velocity of the car model as it moves about in the 3D scene. You can check out the demo video and download the XNA 4.0 project from the link below.
In the demo, use the arrow keys to accelerate, reverse and steer the car. Use keys 1-4 to change the gear and the space key to break. Use keys WASD to control the camera. Use keys j and k to translate the car model along the y-axis.
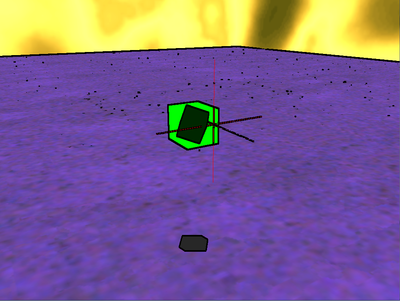
4th Year Honours Project (2012)
This is my honours project I did for my final year at university. It focuses on evaluating the computational efficiency between RK4 and Implicit Euler numerical integration methods for use in the simulation of simple 3D rigid body motion (and specifically focusing on angular and linear velocity calculations affecting a box shape bounding volume based inertia tensor).
The following is a full abstract from my dissertation:
The research topic covered in this dissertation addresses the importance of evaluating and selecting an appropriate numerical integration method for calculation of 3D rigid body motion within a 3D scene. The selected integration methods that are evaluated are the implicit Euler and Runge-Kutta Order Four (RK4) integration methods. The main problem often encountered when implementing a new physics system for an interactive 3D application is selecting an appropriate numerical integration method that provides reasonable numerical accuracy, along with reasonable processing and resource usage on the target platform.
The methodology used to obtain the results for the evaluation of the implicit Euler and RK4 integration methods is implemented in terms of a simple 3D interactive application developed with Microsoft XNA 4.0. This application allows the user to examine the characteristics of 3D rigid body motion using the two selected numerical integration methods. Based on this analysis, the results concerning he efficiency, performance impact and aesthetic quality of the selected integration methods can be assessed. The research undertaken also shows that implementing the empirical model of Newtonian dynamics for 3D rigid body motion is not a trivial matter, as various discrete mathematical modelling techniques need to be used in order to achieve the desired result.
The results obtained show that for a simple interactive 3D application, the use of implicit Euler integration for 3D rigid body motion suffices, while the use of RK4 numerical integration does not provide any significant improvements to the aesthetic qualities of the simulation.
The demo application was developed using XNA 4.0. Below is a link to the demo application project (along with the executable), as well as a PDF copy of my dissertation.
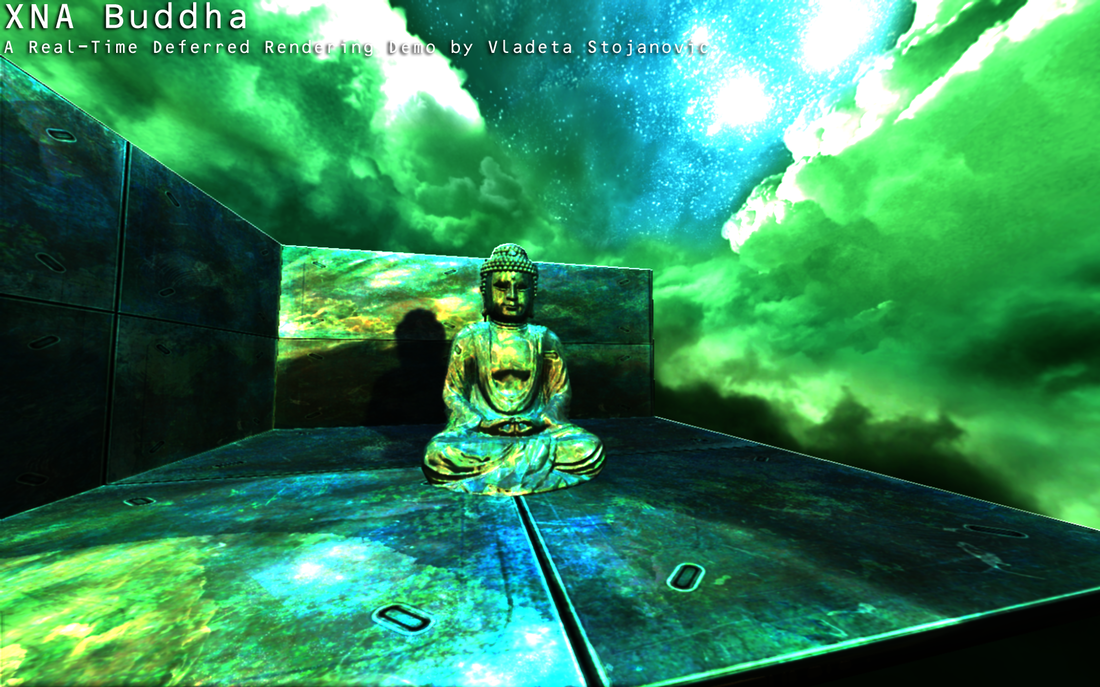
XNA Buddha - A Real-Time Deferred Rendering Demo (2012)
Since I’ve been using XNA a lot at my work, I decided to see how far I could push myself as a graphics programmer using the XNA 4.0 framework. What I ended up with was the XNA Buddha demo application. XNA Buddha is a real-time deferred rendering application whose main focus is to investigate the application of more recent and advanced 3D rendering techniques featured in many of today’s AAA titles. I was inspired to create the demo after reading technical publications about deferred rendering from Guerrilla Games (http://www.guerrilla-games.com/publications/) and DICE (http://dice.se/publications/directx-11-rendering-in-battlefield-3/).
The core functionality of the XNA Buddha demo lies in the GPU rendering of different buffer stages, that are sampled to create the final deferred render (before applying post-processing filters to the final deferred rendered buffer in order to create the final rendered image). A detailed overview of all of these rendering stages is provided in the download link below.
Developing this demo project was a lot of fun and enabled me to prove my programing capabilities in terms of being able to implement and use advanced current generation 3D rendering methods. I also wanted to show that XNA 4.0 can be used to create 3D games and demos using today’s standard real-time rendering methodologies (though I hope that the next release of XNA will include support for Shader Model 4.0 or even 5.0, as this demo pushes the capabilities of Shader Model 3.0 to the limit). You can feel free to download the project with all of the source code and to use it for your personal projects. If you come up with anything cool, let me know.
Side notes: The SSAO in the video and the image below has been toned down (you have to go close to the Buddha model to see it), but in the actual demo the SSAO term is slightly exaggerated (increased radius and threshold), in order to give the final rendered image a more stylish look. Additional credits go to Jockum Skoglund (aka hipshot) for creating the awesome skybox textures I used in the demo - http://www.quake3world.com/forum/viewtopic.php?t=9242.
XNA 4.0 Buddha Project (includes source, project + all of the art assets)
Detailed Overview
Below is a video showing the XNA Buddha demo in action:
Detailed Overview
Below is a video showing the XNA Buddha demo in action:
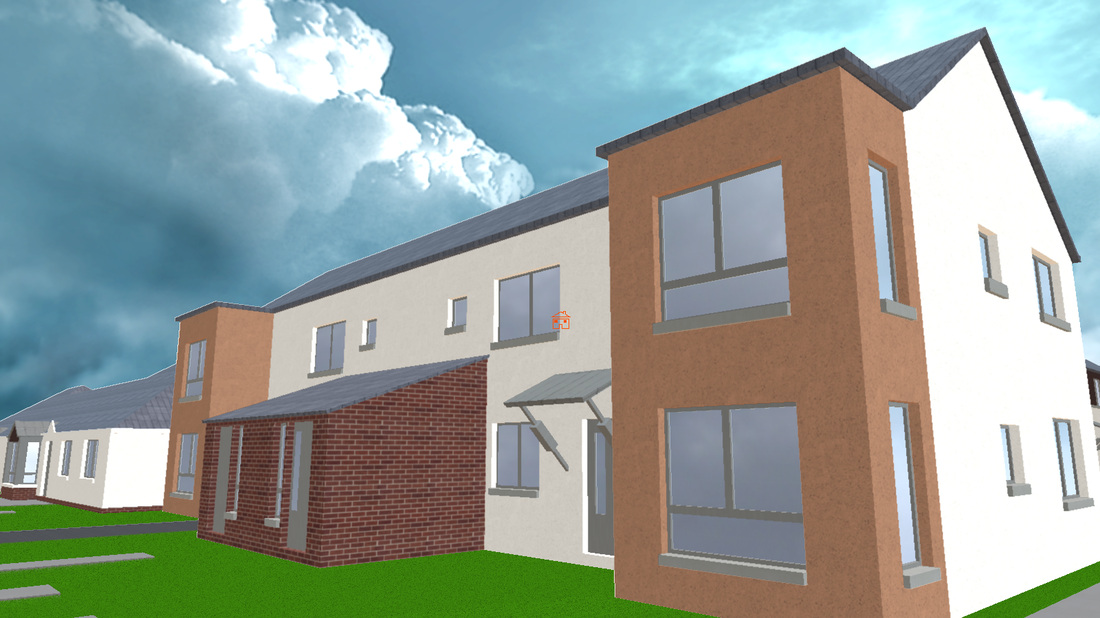
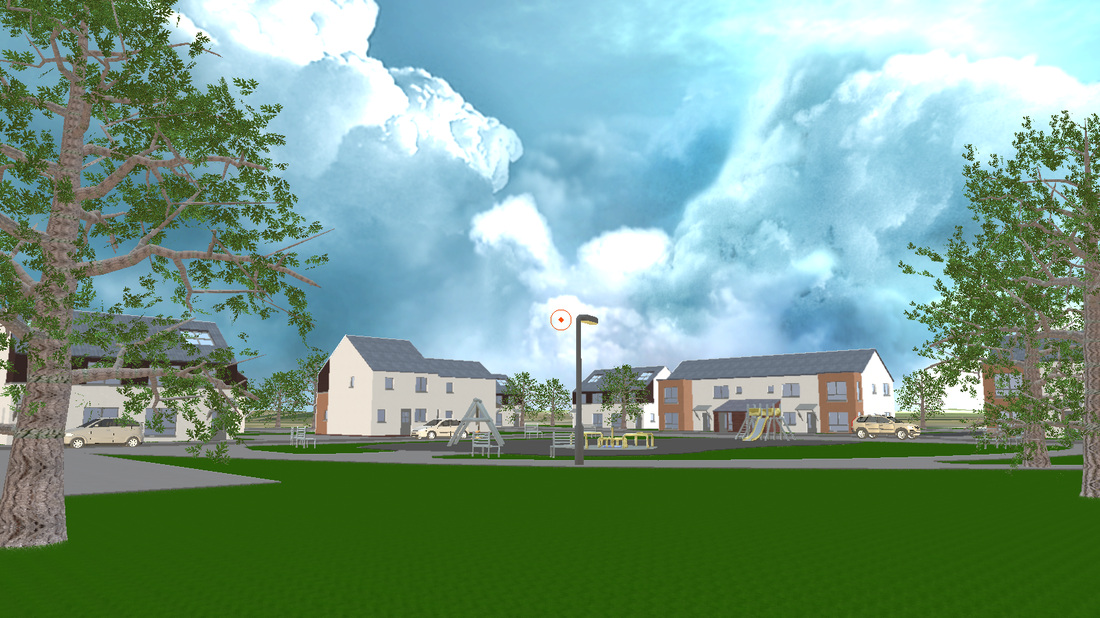
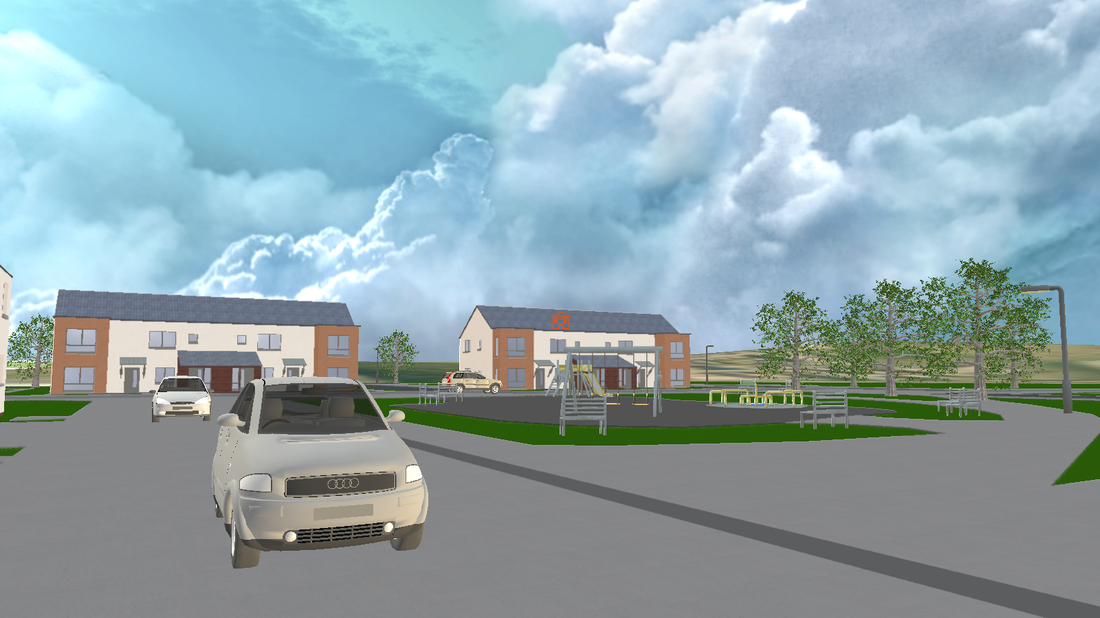
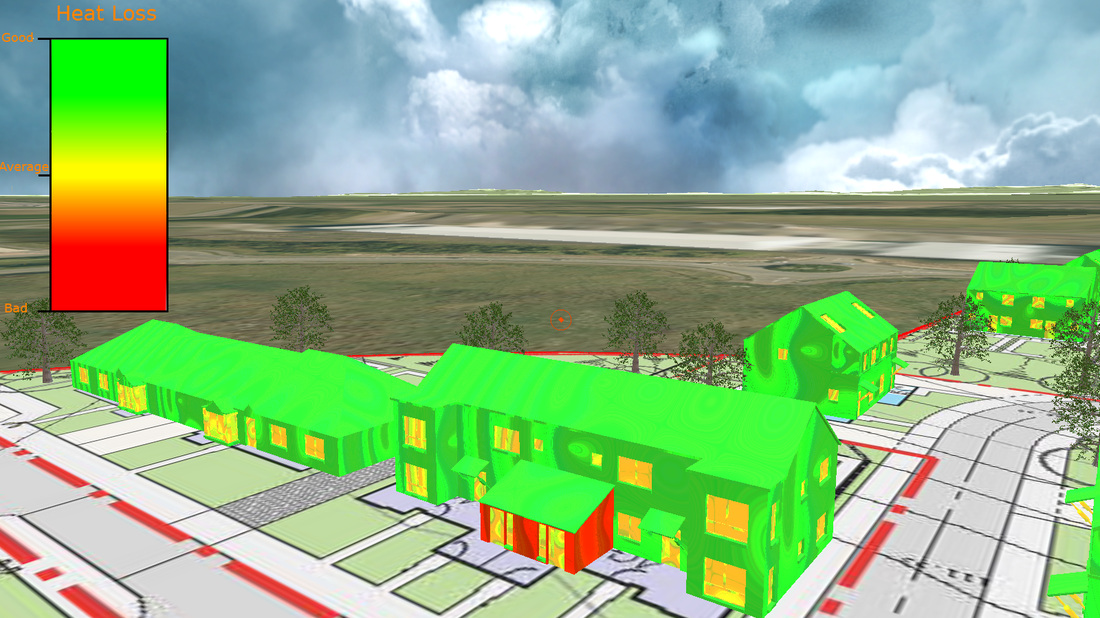
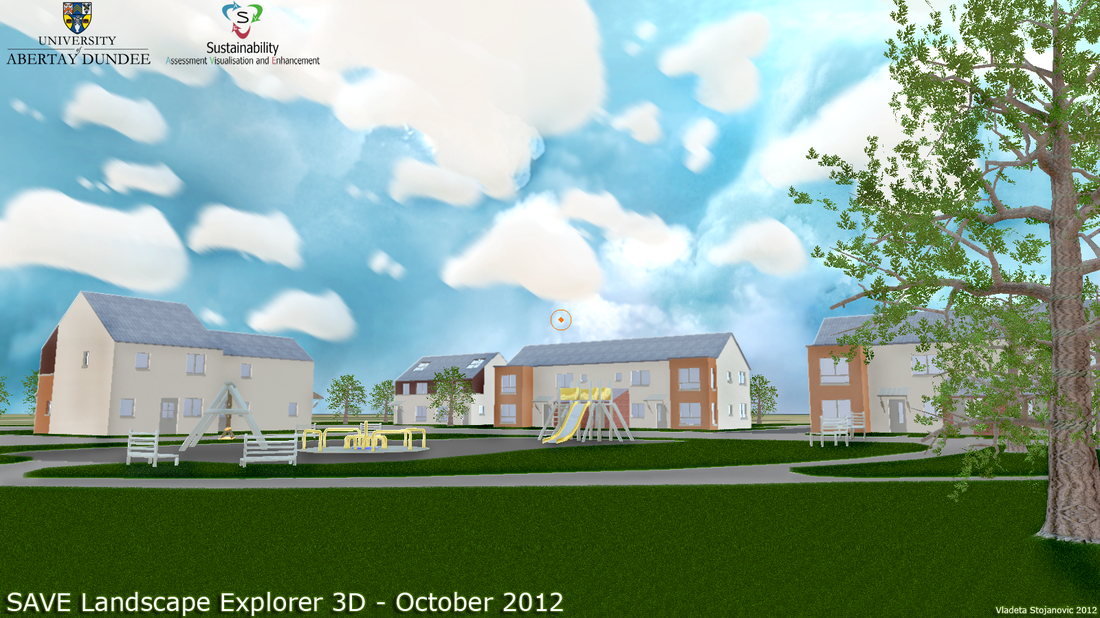
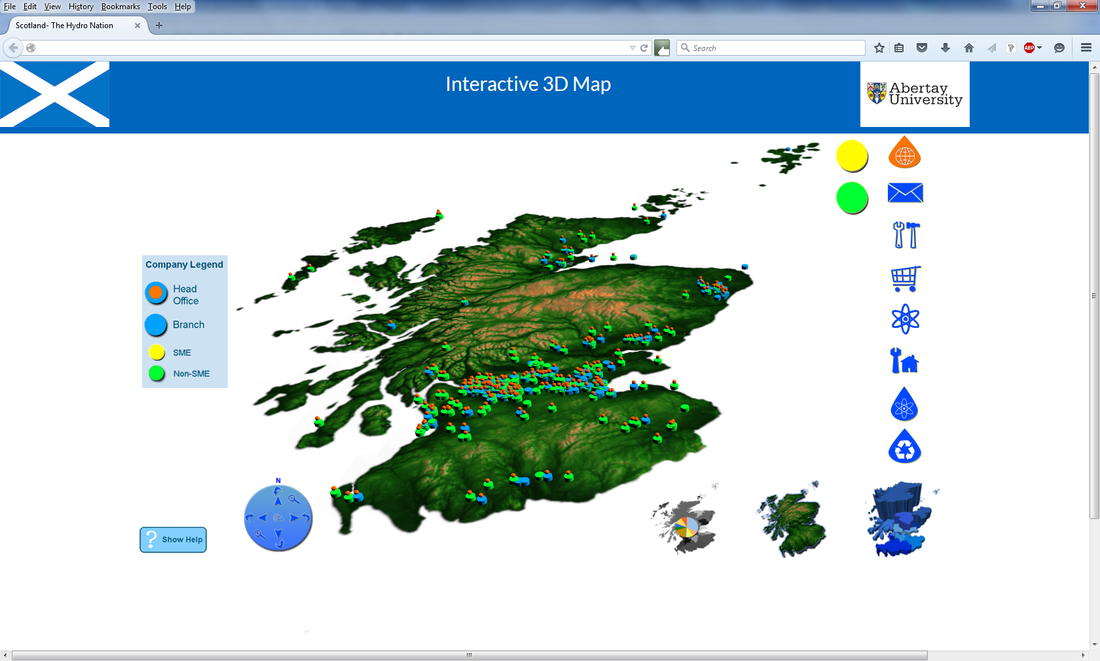
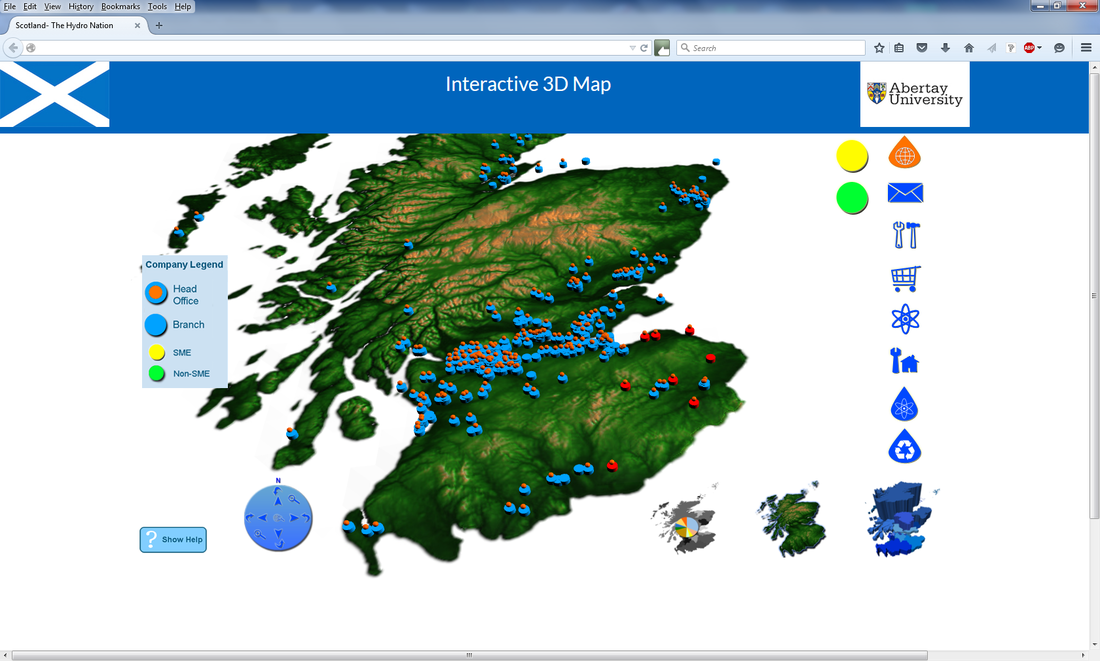
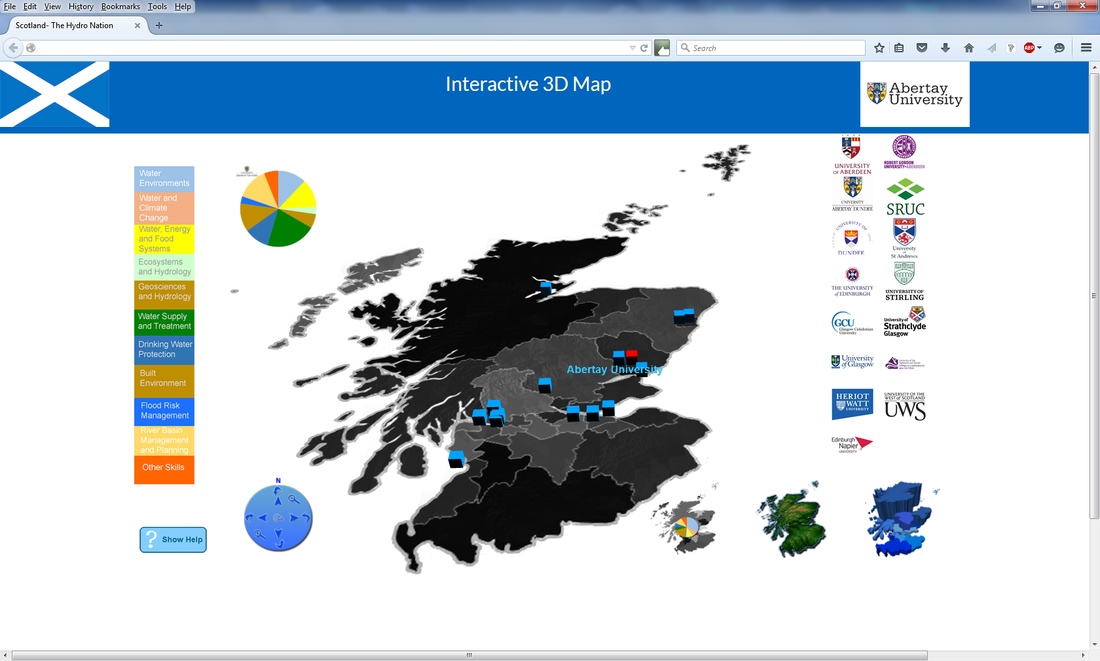
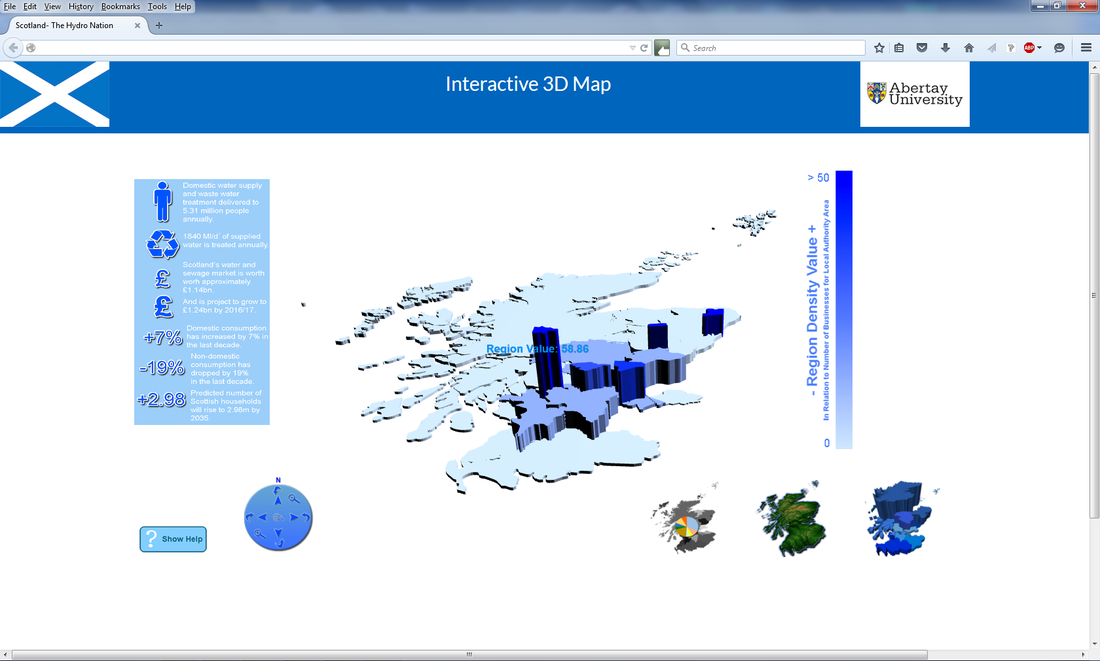
LEX 3D (Landscape Explorer 3D) (2012)
LEX 3D (LandScape Explorer 3D) is an interactive 3D decision support tool I have been working on while at my current job with the SAVE group in the University of Abertay Dundee.
LEX 3D allows both expert and non-expert stakeholders involved in a given regional planning scenario to view and analyse GIS, OS (ordnance survey), architectural and sustainability data in real-time 3D. This is accomplished using games-based technology (XNA 4.0). LEX 3D also allows stakeholders involved in the land use and planning process to modify the coordinate data of key 3D objects in the visualised scenario in real-time, in order to asses the impact provided by certain visual indicators (social, economical, sustainability related, energy usage, etc). LEX 3D is being developed in close collaboration with the Fife Council house planning authority. Additional architectural reference data was provided by the Kingdom Housing Association through the Fife Council.
An upcoming academic paper that details the development and use of LEX 3D is expected to be published in early March 2013 for the BuiltViz 2013 conference (http://www.graphicslink.co.uk/BuiltViz2013/).
Additional Links:
http://save.abertay.ac.uk/


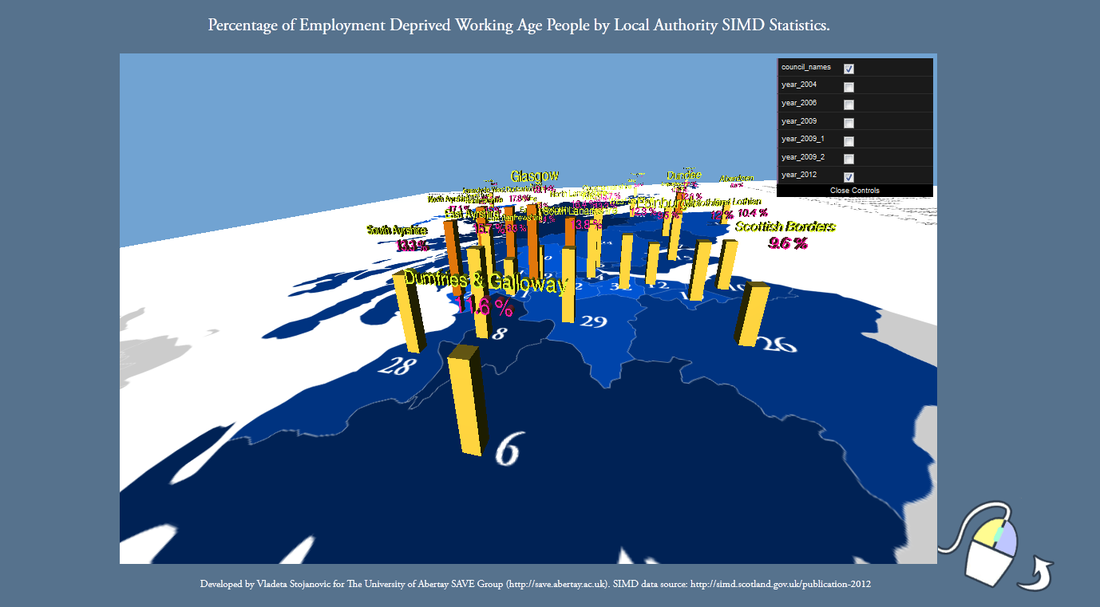
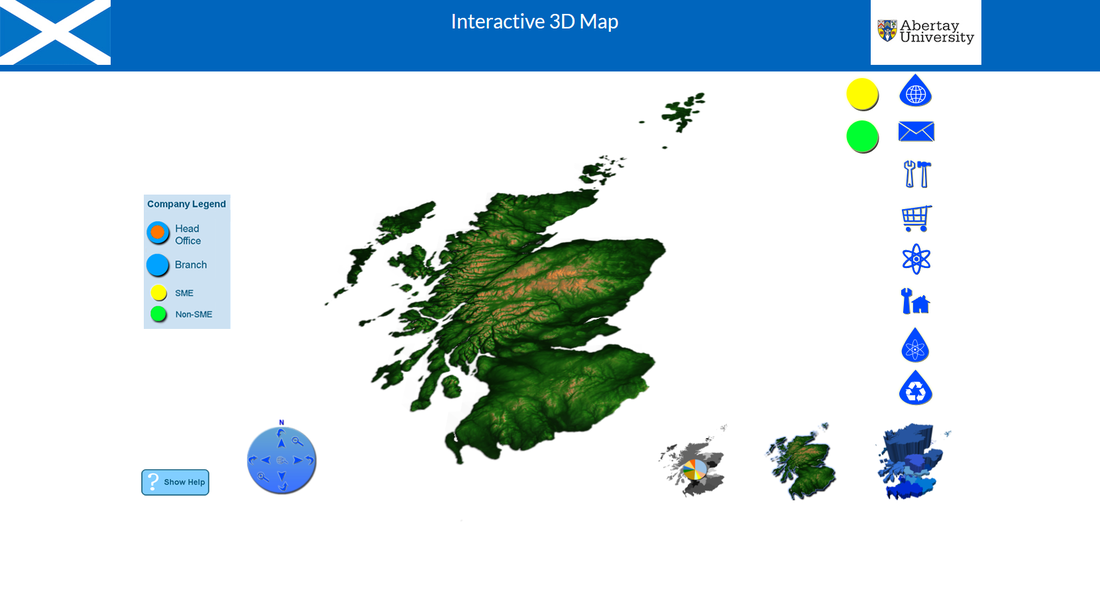
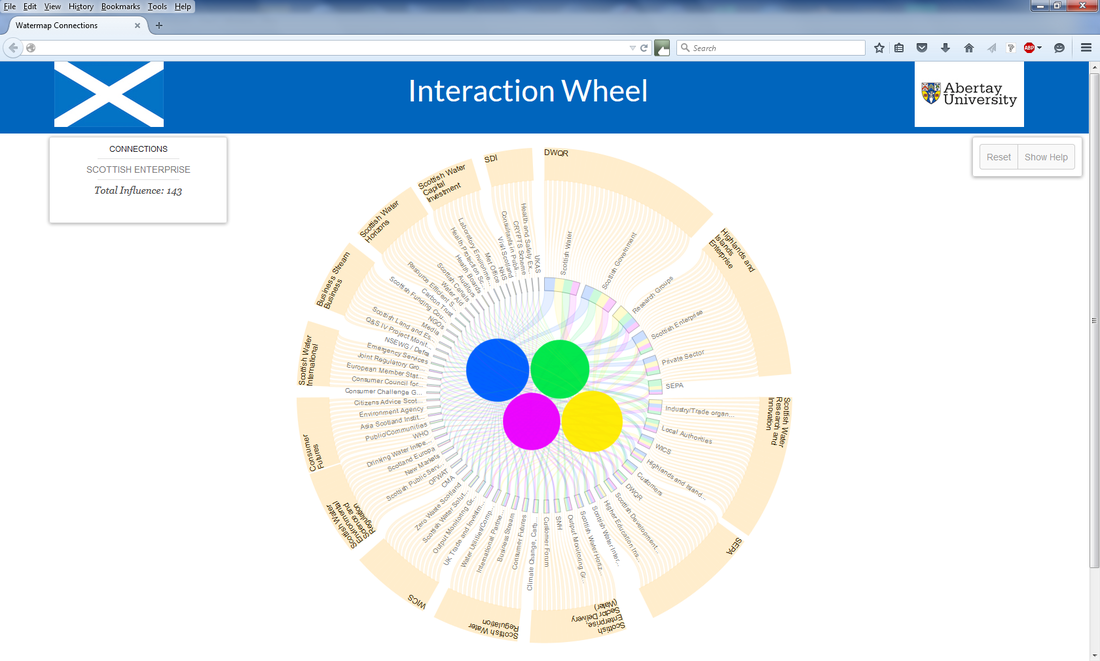
WebGL Data Visualisation Demo (2013)
Please note that you need to have a WebGL enabled browser to run the demo (at a preferable desktop resolution of 1680x1050).
This is a WebGL demo I coded using Three.js and JavaScript. The demo shows the regional statistics for the percentage of employment deprived working age people, based on each Scottish local council authority. This data was obtained from the 2012 Scottish Index of Multiple Deprivation (SIMD 2012). The main emphasis of this demo was to create a clear and informative visualisation tool that could be used by anyone who might be interested in viewing these statistics. The projected planar texture map of Scotland was made using Indiemapper and Inkscape, while the colour scheme of the bars and the text was selected using Colorbrewer.
Optix.Net Real-Time Ray Tracing Teapot Demo (2013)
This is a simple real-time ray tracing demo written in C# and developed using the Optix.Net wrapper for Nvidia’s ray tracing API. You can download Optix.Net from here: http://optixdotnet.codeplex.com/
Big thanks goes to Kyle Hayward ( http://graphicsrunner.blogspot.co.uk/ ) - the person behind the Optix.Net project.
The following features were implemented in the demo:
- Oren-Nayar surface shading (http://en.wikipedia.org/wiki/Oren%E2%80%93Nayar_reflectance_model).
- Lambert surface shading.
- Approximated world space ambient occlusion. Based on examples and references from here: http://www.iquilezles.org/www/articles/ao/ao.htm .
- Irradiance environment map based indirect ambient lighting. Based on the paper by R.Ramamoorthi and P.Hanrahan: http://www.cs.berkeley.edu/~ravir/papers/envmap/envmap.pdf .
Essentially the approximated ambient occlusion and indirect ambient lighting are used to create a cheaper version of the dynamic ambient lighting method described by Michel Bunnell is GPU Gems 2:
http://http.developer.nvidia.com/GPUGems2/gpugems2_chapter14.html .
- Ray-traced hard shadows (very easy to accomplish using the Optix API).
- Ray traced soft shadows using a simplified version of the teapot model as the primary shadow occluder. Based on the “Single Sample Soft Shadows” method by S.Parker, P.Shirley and B.Smits:
http://www.cs.utah.edu/~bes/papers/coneShadow/ .
- Sbvh/Bvh scene traversal (more info here: http://www.nvidia.com/docs/IO/77714/sbvh.pdf ).
My primary motivation for developing and releasing this demo was that I felt there were not enough resources available for using Optix.Net. So I’m hoping other developers who are interested in programming with Optix and Optix.Net will find this demo useful. My other motivation for developing this project was that I wanted to get my hands dirty with CUDA C programming and learn more about the basics of real-time ray tracing. I also wanted to experiment with implementing more advanced shading methods, such as the Oren-Nayar shading model, which are used in more complex real-time rendering systems.
I discovered that real-time ray tracing is very good for rendering static scenes and quickly generating accurate shadow volumes. It is also much more straightforward to implement complex surface shading effects (such as Renderman style shaders). However, at the same time I found that trying to do anything dynamic with the scene (such as removing and adding objects), is not very flexible (as the scene traversal structures need to be re-built). Thus my current stance on real-time ray tracing is that it is flexible enough to be used for rendering certain static scene components, but it is not quite flexible enough yet to render entire dynamic scenes. More advanced methods such as path tracing are only just beginning to make their mark in real-time rendering, as they are still very computationally expensive to process in real-time (unless you have a very high-end system). Still, in a few years time, I think we will see a much more closer merging of rendering techniques originally designed for offline rendering with real-time rendering methods.
Additionally, you can download the ambient occlusion and irradiance environment map based indirect ambient lighting routines here.


Download Optix.Net Teapot Demo Project
Blender Citadel City Generator (2013)

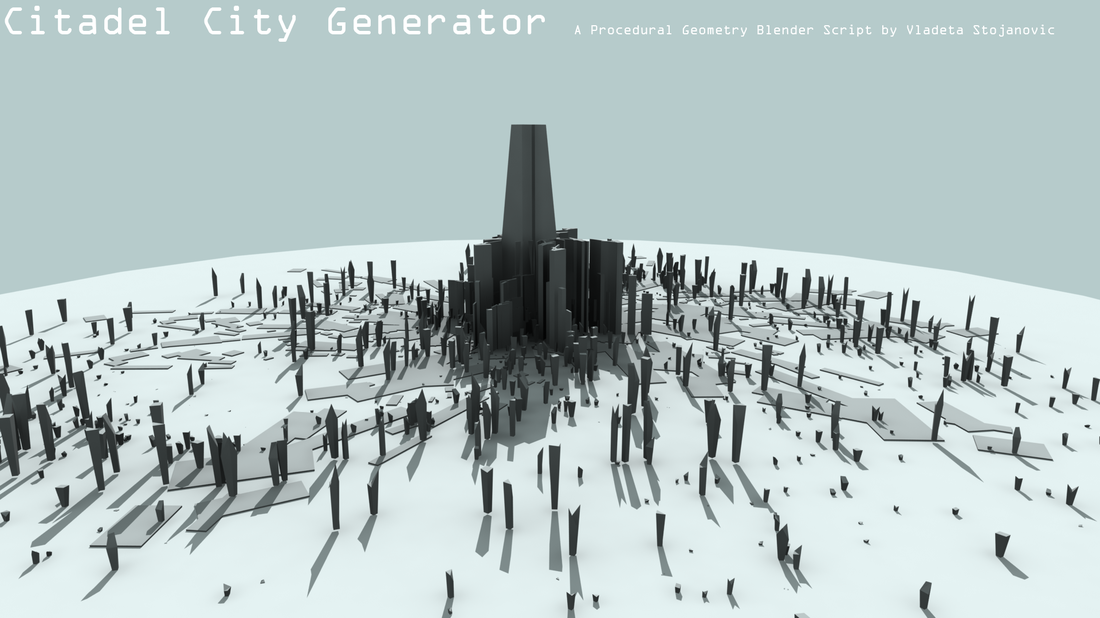
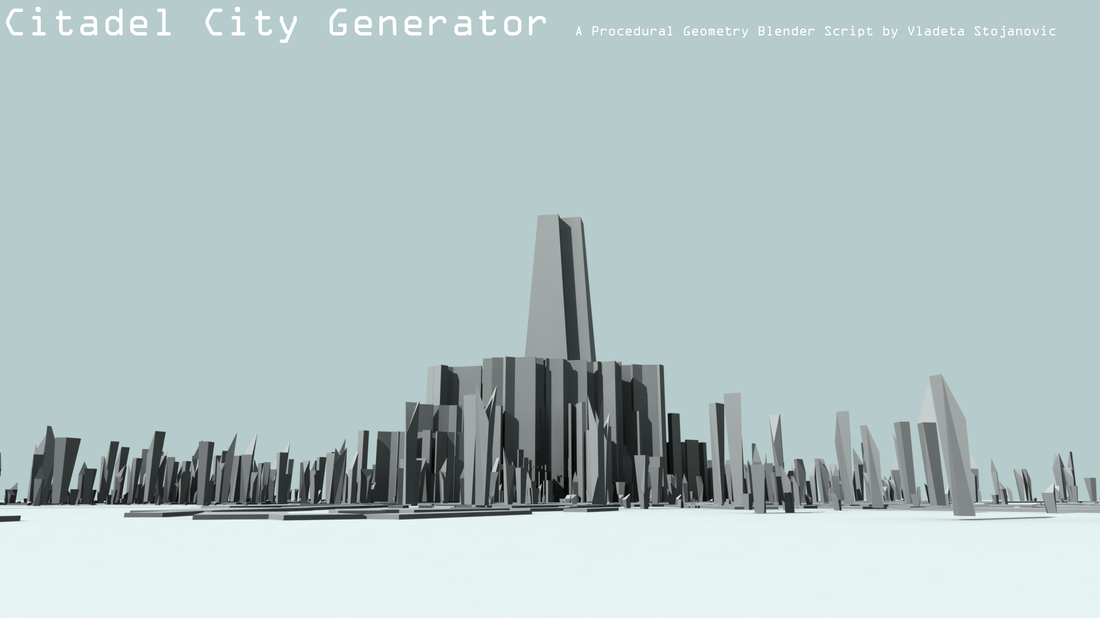
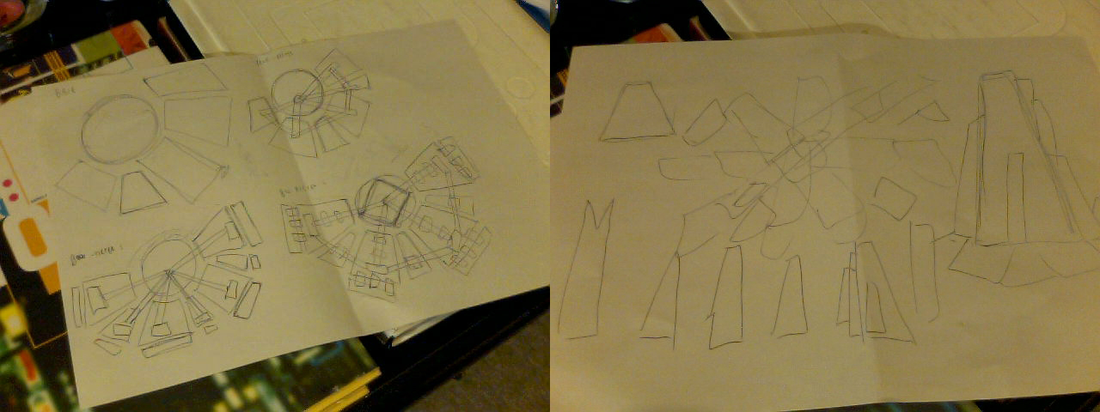
I have recently been researching procedural geometry generation methods for use in visualisation prototyping. I decided to try and create a simple city generator using Blender and Python (version 2.66a). The end result is the Citadel City Generator script. I was originally inspired to try and create similar architectural geometry as that found in the game Half Life 2 - especially in terms of visual aesthetics incorporated into the Combine regime art style (mainly the artwork of Viktor Antonov). After making a few rough sketches of what I had in mind, I decided to go for a “clustered hive” look - in terms of the topological and spatial features of the generated scene geometry.
The layout of the scene is composed of four generator function types - the base function (for the flat looking areas that could be roads or suburbs), the deformed geometry function (for the taller twisted mini-citadels that populate the larger parts of the scene), the hive building generator (for more dense and uniform geometric shapes that form the centre of the scene and the base of the main hive) and the citadel generator function, which generates the eye-catching centre piece of the scene. If you were to look down onto the scene, you would see that the overall scene topology is similar to that of a snow flake.
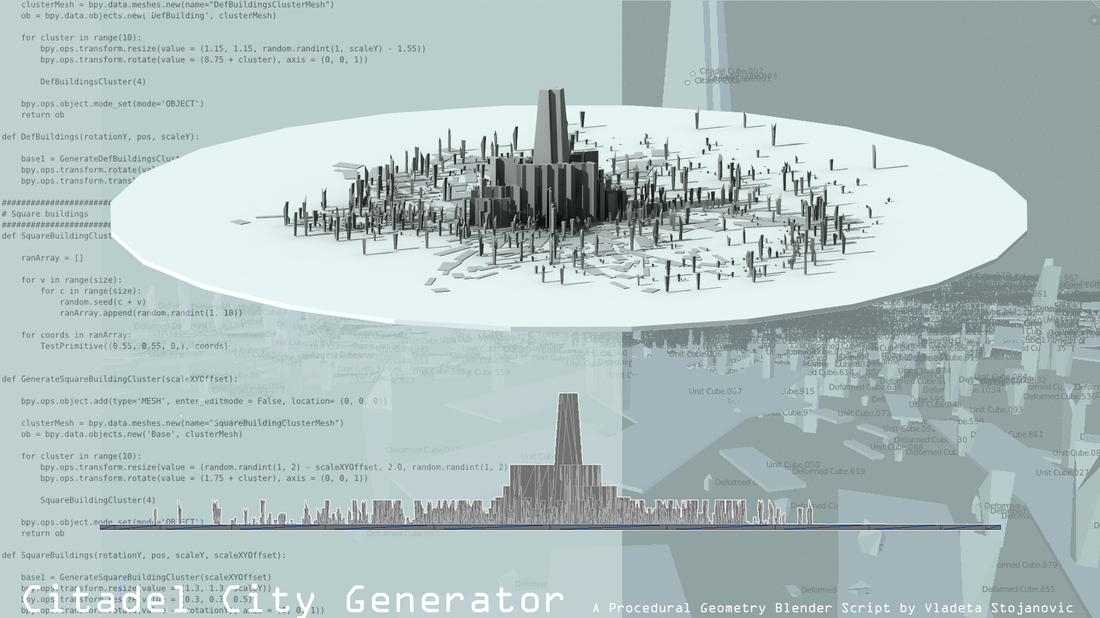
The script itself is nothing really special. Using the script, a number of uniform cube primitives are generated (either with uniform or displaced vertex positions), before being instanced into different clusters that are then called as the main generator functions. The cluster functions simply scale, rotate and translate the primitives in a spiral hive-like pattern.This is what fascinates me about procedural rendering methods - as with just a few lines of code, you can create entire worlds.
The layout of the scene is composed of four generator function types - the base function (for the flat looking areas that could be roads or suburbs), the deformed geometry function (for the taller twisted mini-citadels that populate the larger parts of the scene), the hive building generator (for more dense and uniform geometric shapes that form the centre of the scene and the base of the main hive) and the citadel generator function, which generates the eye-catching centre piece of the scene. If you were to look down onto the scene, you would see that the overall scene topology is similar to that of a snow flake.
The script itself is nothing really special. Using the script, a number of uniform cube primitives are generated (either with uniform or displaced vertex positions), before being instanced into different clusters that are then called as the main generator functions. The cluster functions simply scale, rotate and translate the primitives in a spiral hive-like pattern.This is what fascinates me about procedural rendering methods - as with just a few lines of code, you can create entire worlds.
Retro 3D Post Processing Demo (2013)
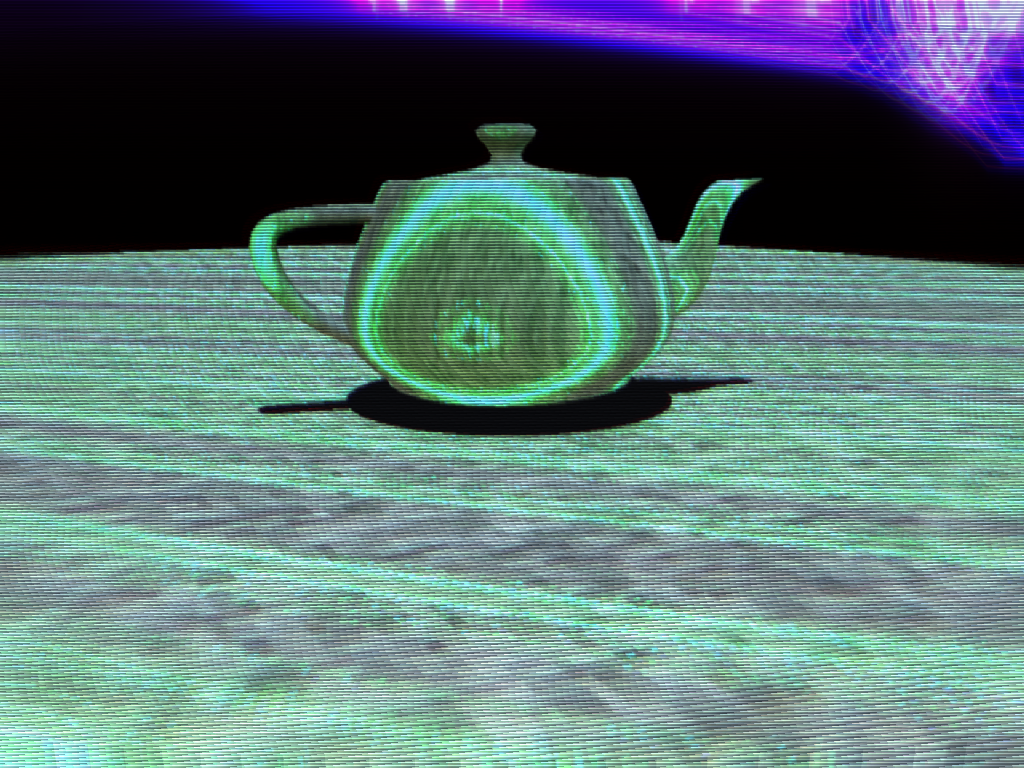
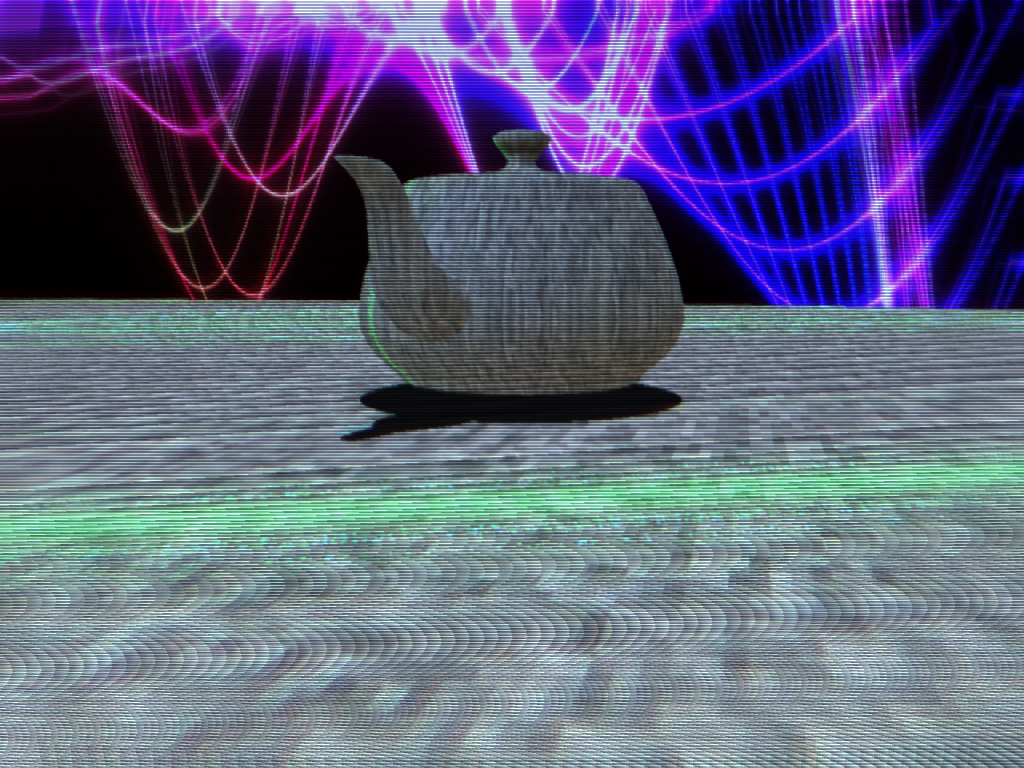
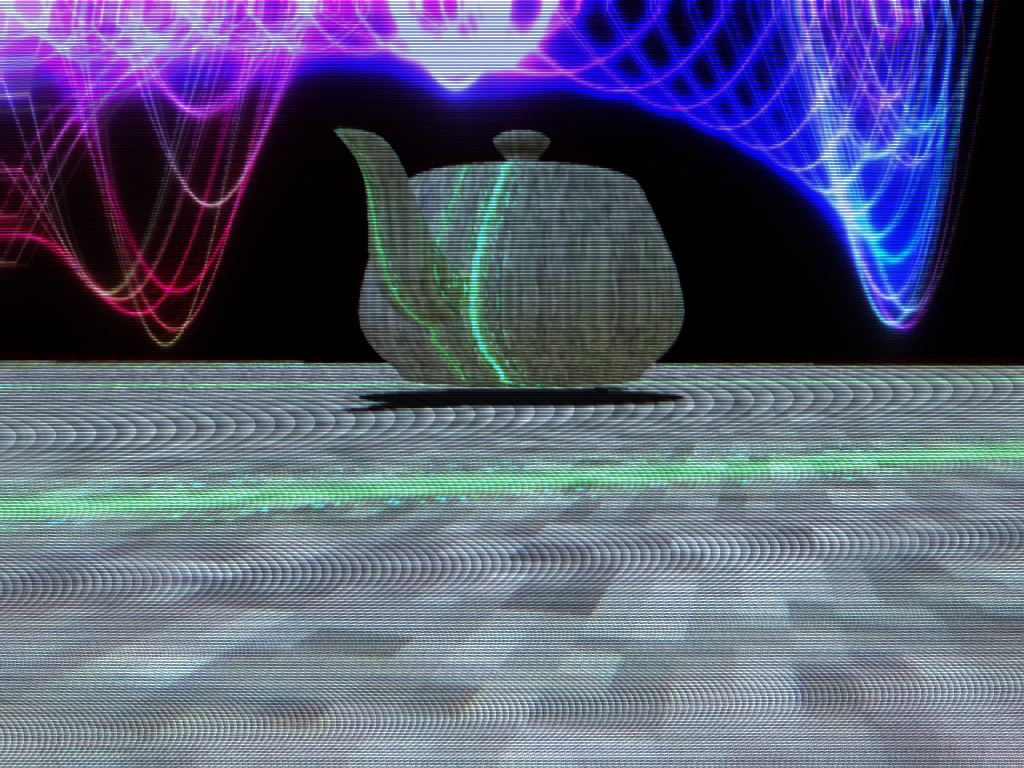
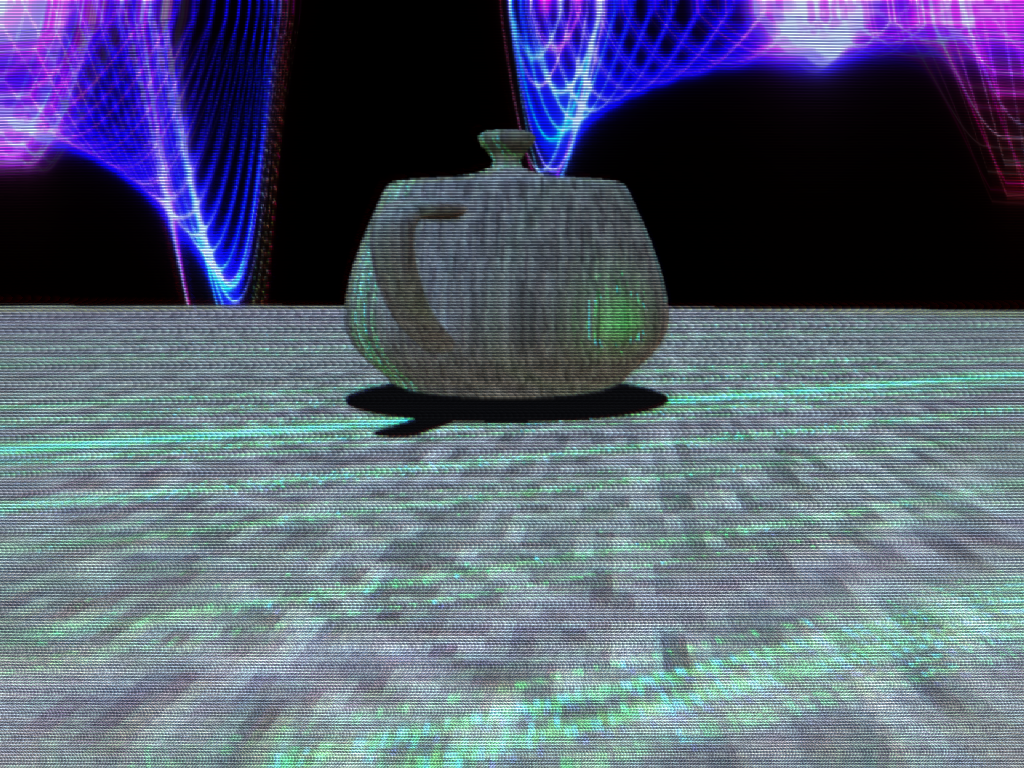
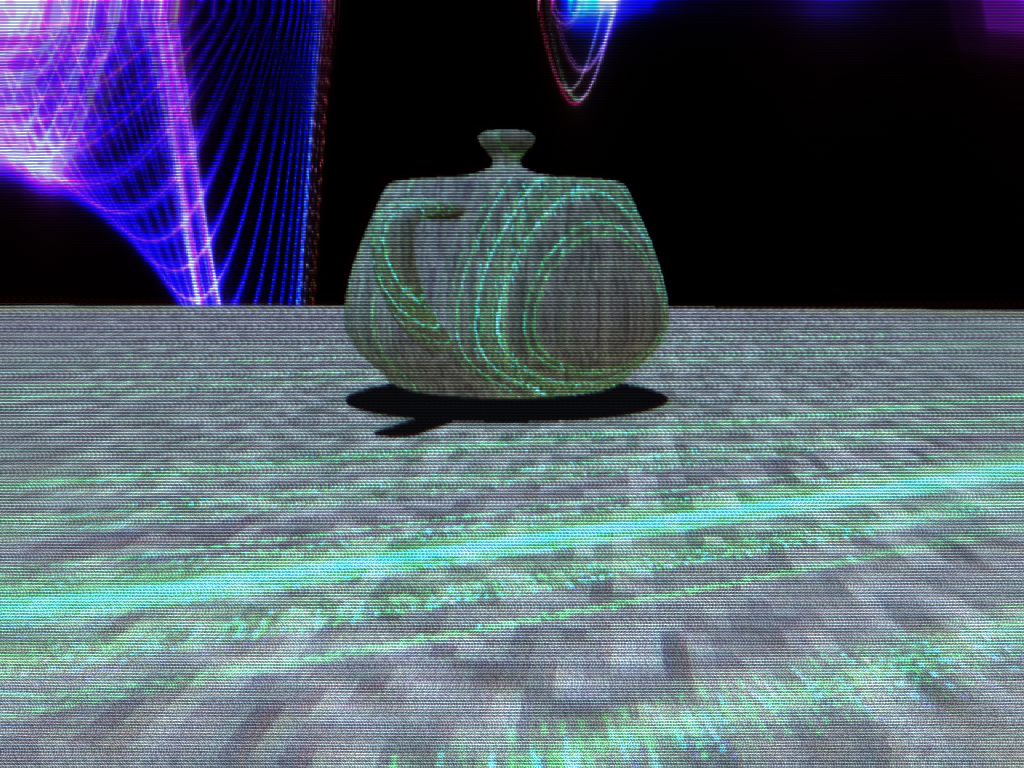

This is a post processing demo developed using XNA 4.0 based on various bits and pieces of shader code I wrote for the Enforcer game prototype, and subsequently modified for the The Junkie prototype. I have since created a framework template project that can be re-used for other applications. All of the shader code is written in HLSL – making use of the shader model 3.0 specification.
The objective of this demo is to emulate retro 3D graphics (sort of like the 3D graphics you would see on the PS One or the Sega Saturn). I originally became interesting in this sort of graphics emulation after reading about the technicalities of emulating old SNES games using the MAME emulator. However my interest in emulating retro 3D game graphics effects is purely aesthetic, rather than trying to preserve the visual style of old 3D games. The post processing effects I researched and implemented were largely based on example GLSL fragment shaders from the Heroku GLSL gallery and Shadertoy. After finding examples of fragment shader effects that interested me, I essentially reverse engineered the shaders using HLSL and modified them to produce the desired effect I wanted. I ended up implementing the following post processing effects:
- Pixelation filter
- Fisheye lens distortion filter
- Colour enhancement filter
- CRT/Scanline filter
- Chromatic aberration filter
- TV signal noise filter (pseudo-random noise + modulated sine wave distortion)
Apart from the post processing effects, I also implemented an animated glowing sine/cos wave effect in the skybox shader, as well as a corresponding "Borg wave" surface shading effect. The default surface shading for the teapot makes use of 1:1 texel scaling (so the texturing looks really old-skool – before texture filtering became a standard feature).
Download the Retro 3D Post Processing Project Template
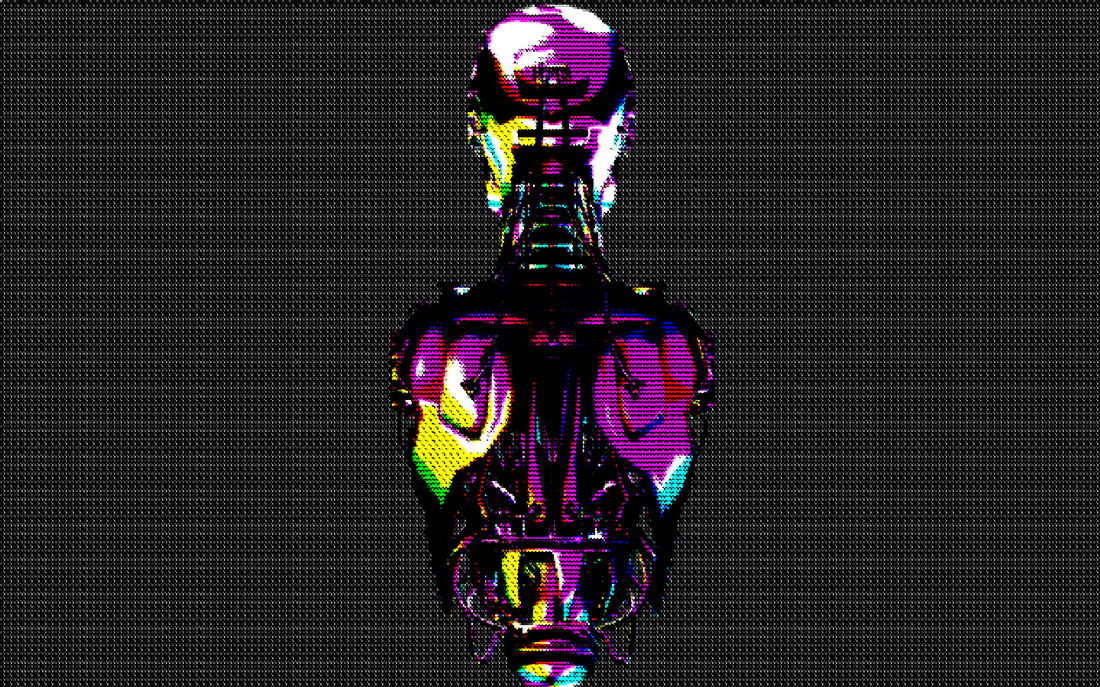
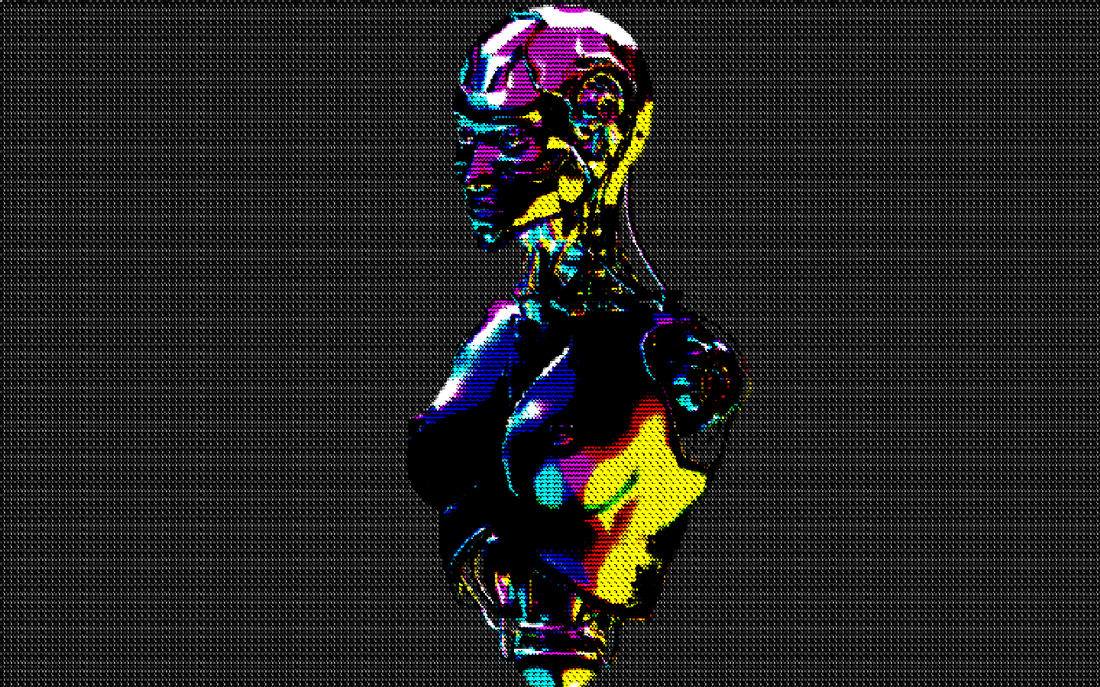
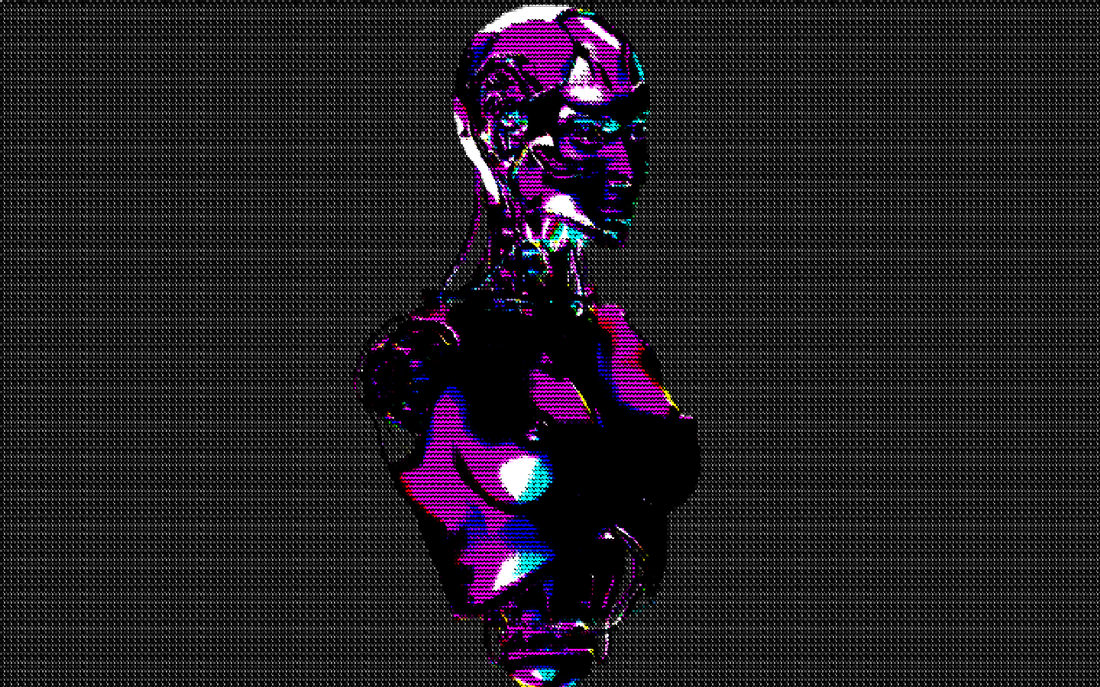
Spectral Accumulation Shader (2014)
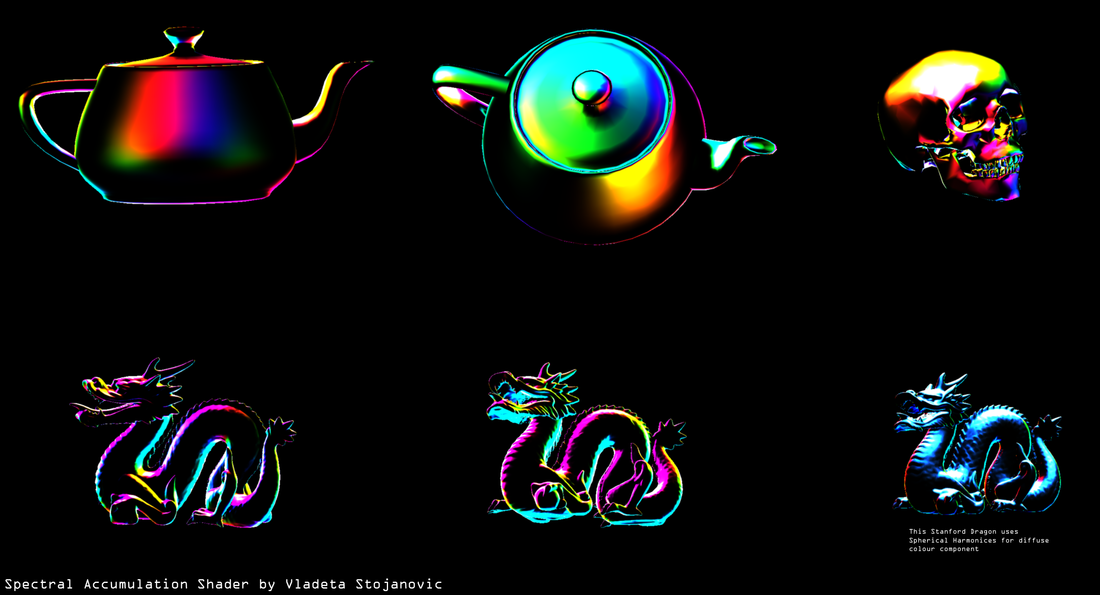


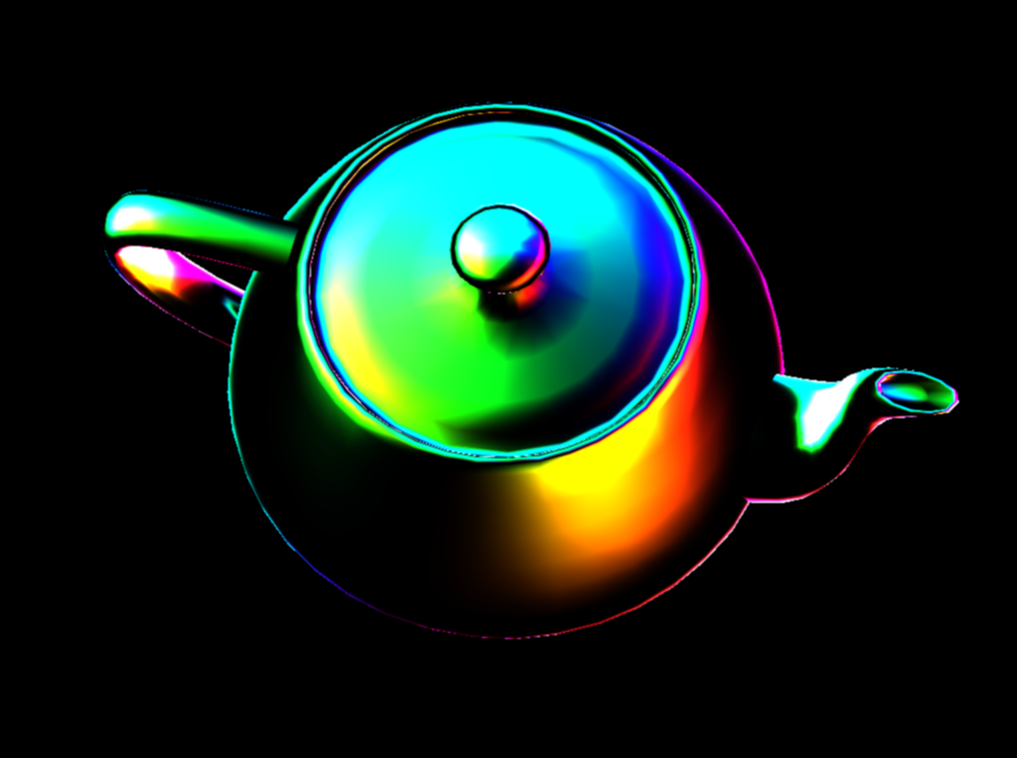

This started out as a shader programming experiment - I discovered this somewhat by accident, as I originally wanted to write a simple Lambert diffuse shader and mess around with it (using some Blinn shading variations). What I ended up with is I guess a quick spectral accumulation using depth and world space banding. A similar but more complex shader that can be compared to my spectral accumulation shader would be the "thin film" shader.
I would certainly define my spectral accumulation shader as a non-photorealistic (NPR) rendering method - perhaps it can be used as a technique to add funky flavor to a diffuse shading component.
Below is the HLSL code for the shading function:
float4 _SpectralAccumShader(float3 _normal, float3 _eyeVector, float3 _vertexPosition, int occSteps, int spectralBands, float highlight_value)
{
float4 outColor = float4(0, 0, 0, 0);
float3 lambert = saturate(dot(_normal, _eyeVector)); //switch eyeVector to lightPosition if using static light
float3 halfway = normalize(lambert + eyeVector);
float3 spectralMap = halfway - _normal;
float3 depthMap = _vertexPosition / 100.0f;
float occDistance = length(normalize(depthMap));
float specDistance = length(normalize(spectralMap));
for (int i = 0; i < occSteps; i++)
{
occDistance += dot(_normal, depthMap);
specDistance += dot(_normal, spectralMap);
}
occDistance /= occSteps;
specDistance /= occSteps;
float3 diffuseResult = float3(occDistance + specDistance, occDistance + specDistance, occDistance + specDistance);
float3 spectralResult = diffuseResult;
//Accumulate the colour spectrum
for (int j = 0; j < spectralBands; j++)
{
//spectralResult *= cross(diffuseResult, spectralMap); //object space
spectralResult *= cross(spectralMap, diffuseResult); //world space
}
outColor = saturate(float4((diffuseResult * highlight_value) * spectralResult, 1.0f));
return outColor;
}
Additionally, I decided to incorporate a very retro 80's cyberpunk look in another test project in order to complement the spectral accumulation surface component. The key to this look is the implementation of the Floyd–Steinberg dithering algorithm as a post-processing effect. For additional specular highlights I also used the Cook-Torrence specular surface shader with a roughness distribution factor of 0.6f (in addition to the spherical harmonics lighting term using the irradance cubemap based method described by Ravi Ramamoorthi Pat Hanrahan).

And here is the HLSL dithering algorithm code, if anybody is curious:
/////////////////////////////////////////////////////////////////////////////////////////////
// Cross hatch dithering effect.
// Based on reference and code examples from: http://en.wikipedia.org/.../Floyd%E2%80%93Steinberg...
// http://www.2038bug.com/ptrans/ptrans.html
// http://devlog-martinsh.blogspot.co.uk/.../glsl-dithering...
//////////////////////////////////////////////////////////////////////////////////////////////
float find_closest(int x, int y, float c0)
{
float4x4 dither = float4x4(1.0, 33.0, 9.0, 41.0,
49.0, 17.0, 57.0, 25.0,
13.0, 45.0, 5.0, 37.0,
61.0, 29.0, 53.0, 21.0);
float limit = 0.0;
if(x < 4)
{
limit = (dither[x][y]+1.0)/64.0;
}
if(c0 < limit)
{
return 0.0;
}
return 1.0;
}
int mod (int a, int b)
{
int ret = a % b;
if(ret < 0)
{
ret += b;
}
return ret;
}
float4 PS_Hatch(float2 tex:TEXCOORD0)
{
float4 oldPixel = tex2D(TextureSampler, tex);
float grayscale = dot(oldPixel, float4(0.299, 0.587, 0.114, 0));
float2 xy = tex.xy * float2(640, 320);
int x = int(mod(xy.x, 4));
int y = int(mod(xy.y, 4));
float finalLum = find_closest(x, y, grayscale);
float3 finalRGB;
finalRGB.r = find_closest(x, y, oldPixel.r);
finalRGB.g = find_closest(x, y, oldPixel.g);
finalRGB.b = find_closest(x, y, oldPixel.b);
return saturate(float4(finalRGB, 1.0) * finalLum);
}
TAYplan Strategic Land Use Planning Visualisation (2013/2014)
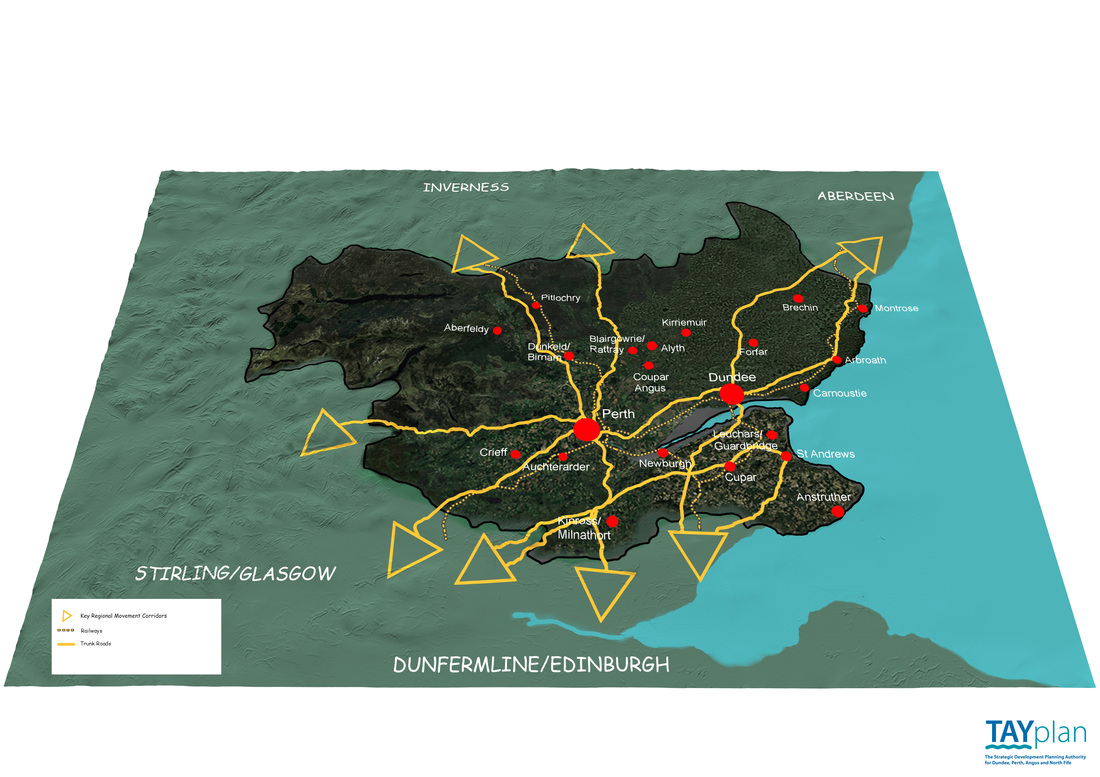
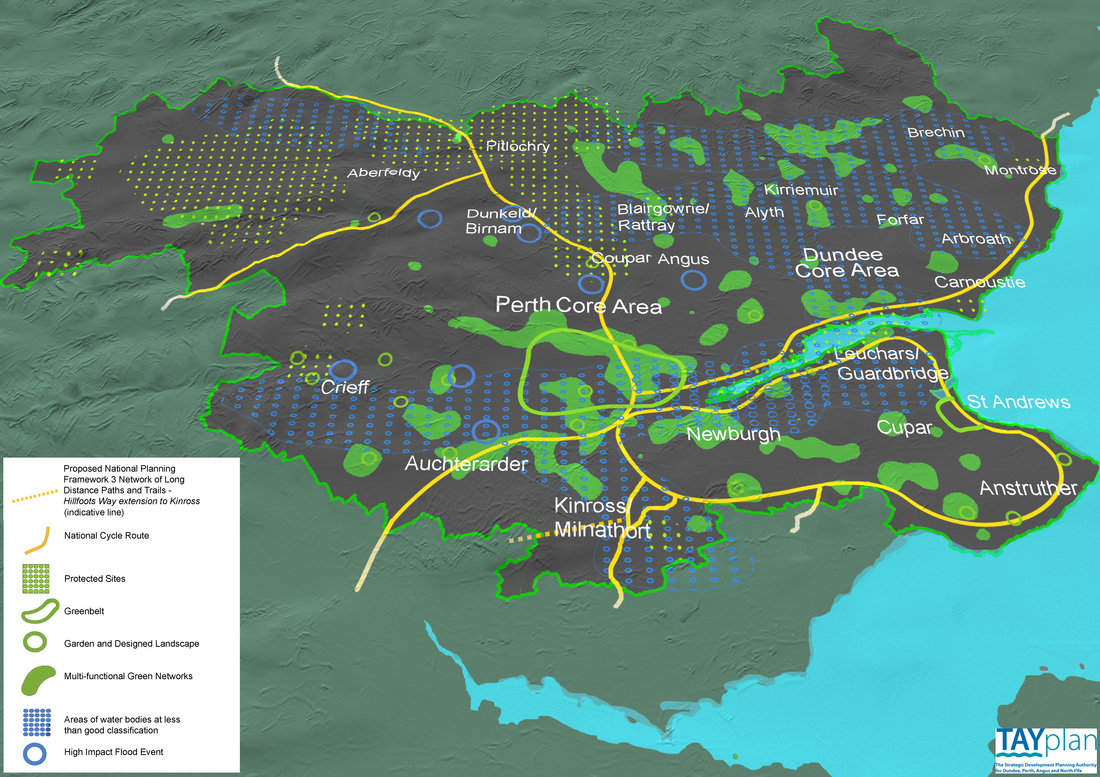
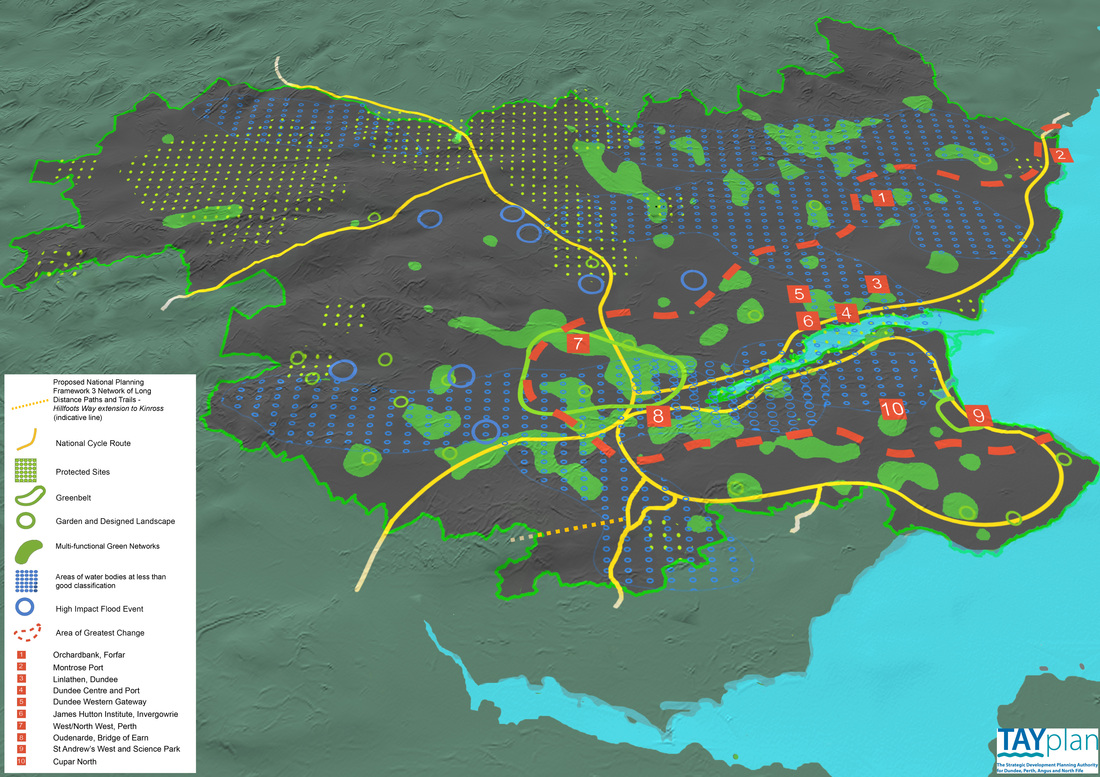
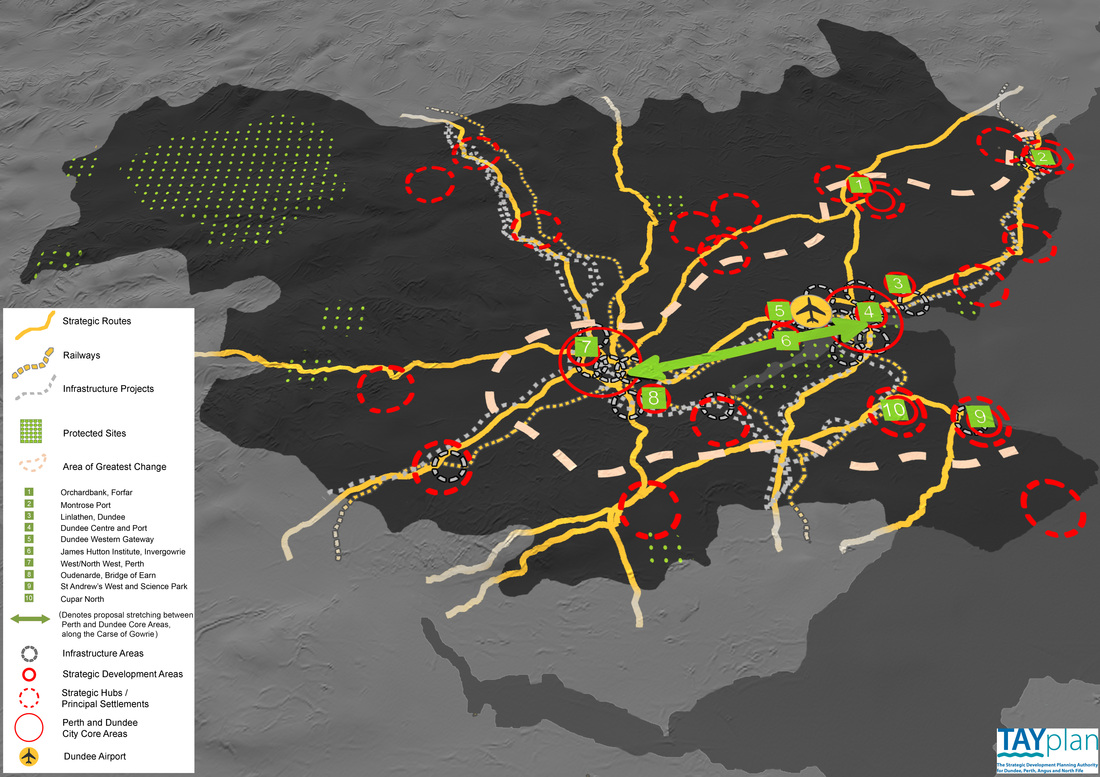

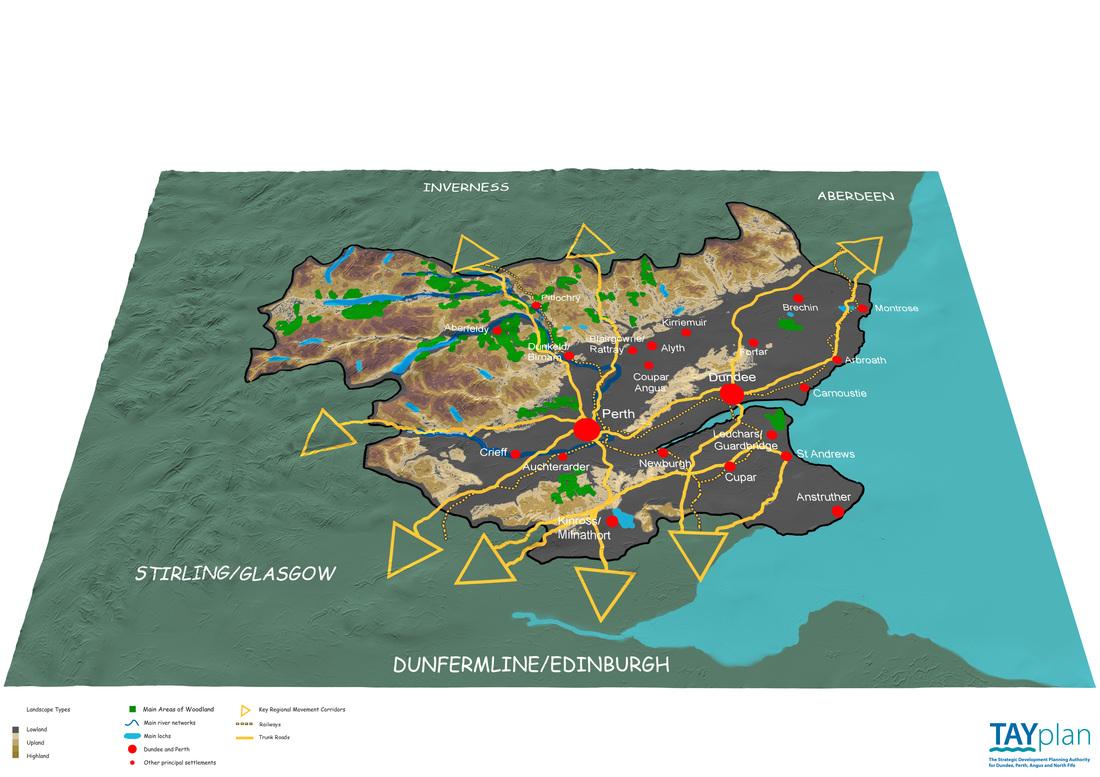
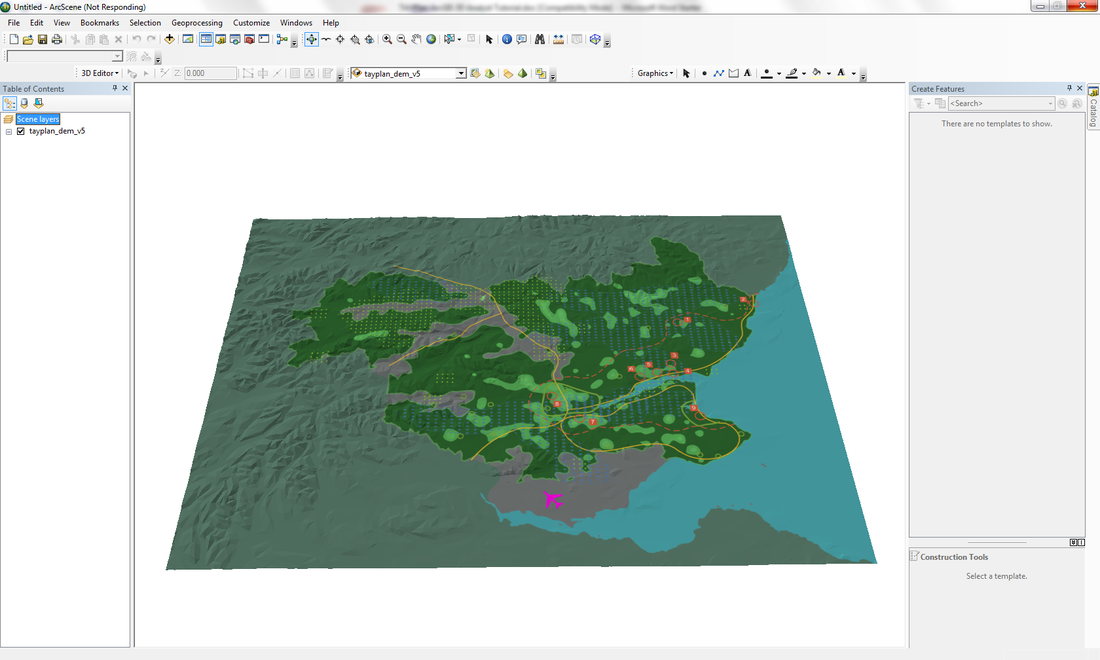
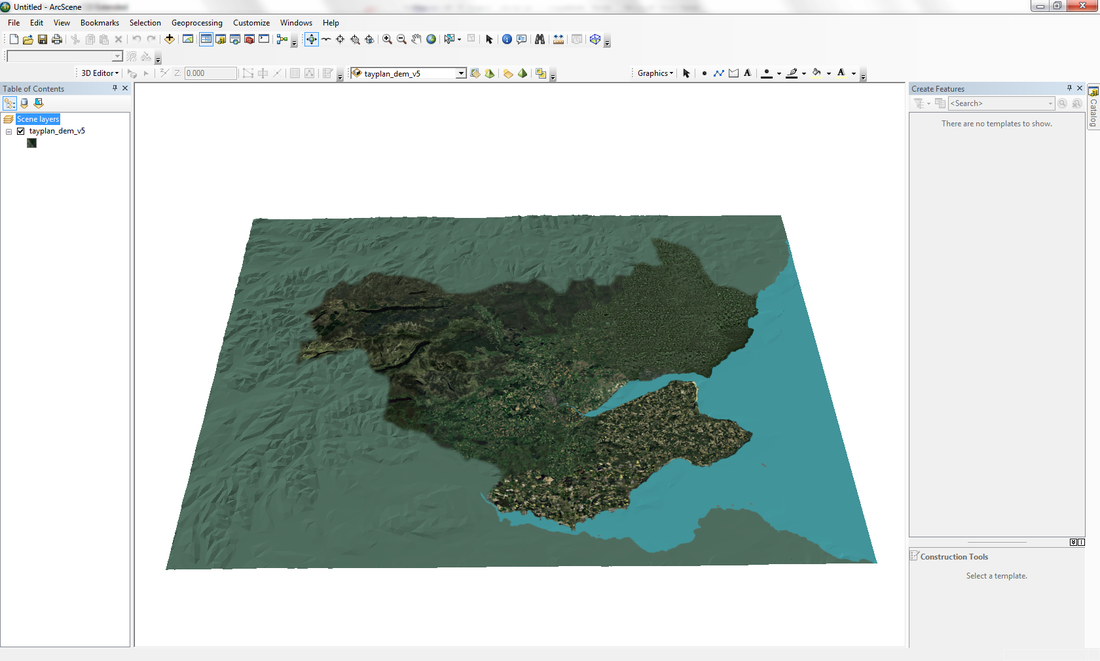
The purpose of the TAYplan Strategic Land Use Visualisation project was to produce an engaging overview of the land use and development proposals for the Dundee, Angus, Perth and North Fife regions of Scotland – with a specific focus on wider stakeholder engagement. As part of the Abertay University SAVE group, I worked as the lead visualisation researcher from the beginning of the project in August 2013 until the end in April 2014. Through ought the project, we collaborated closely with planning experts from TAYplan Strategic Development Planning Authority for Dundee, Angus, Perth and North Fife.
The main outputs from the project included high resolution rendered images that made of use of aggregated GIS, Ordnance Survey, aerial photography and specific indicator data – as well as a fly-through animation of the main development region. The other part of the project focused on consultation and training work with staff members from TAYplan, in order to promote the use and demonstrate advantages of 3D visualisation for land use planning applications.
The main software that was used to create the visualisations included LightWave 3D, Photoshop and ArcGIS 3D Analyst. The final rendered images were published as part of a publicly available planning proposal written by TAYplan (Main Issues Report 2014 Non-technical Summary). Additionally, the fly-through video has been presented at public consultations around the Dundee, Angus, Perth and North Fife.
3D PHPP Tool Prototype (2014)


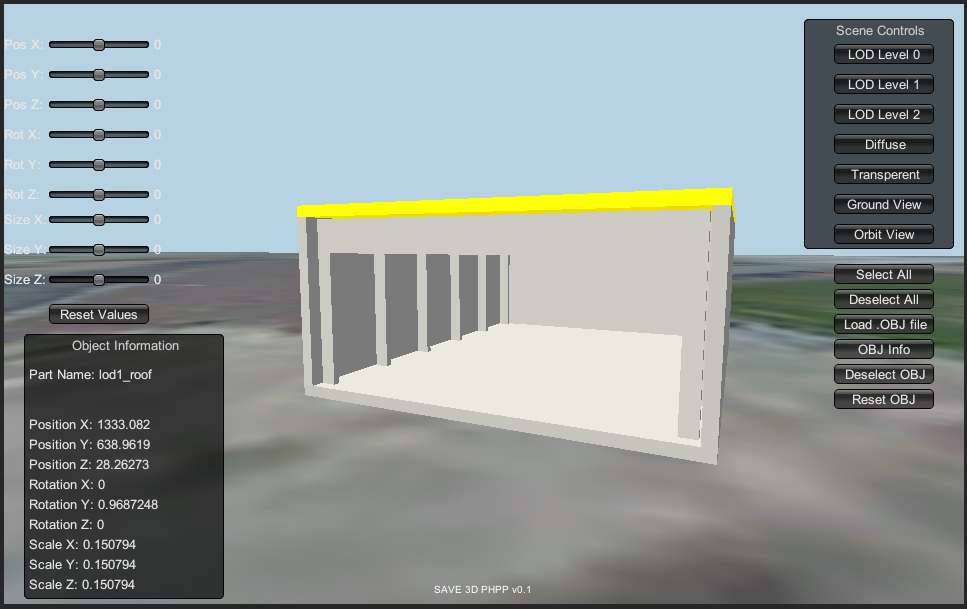

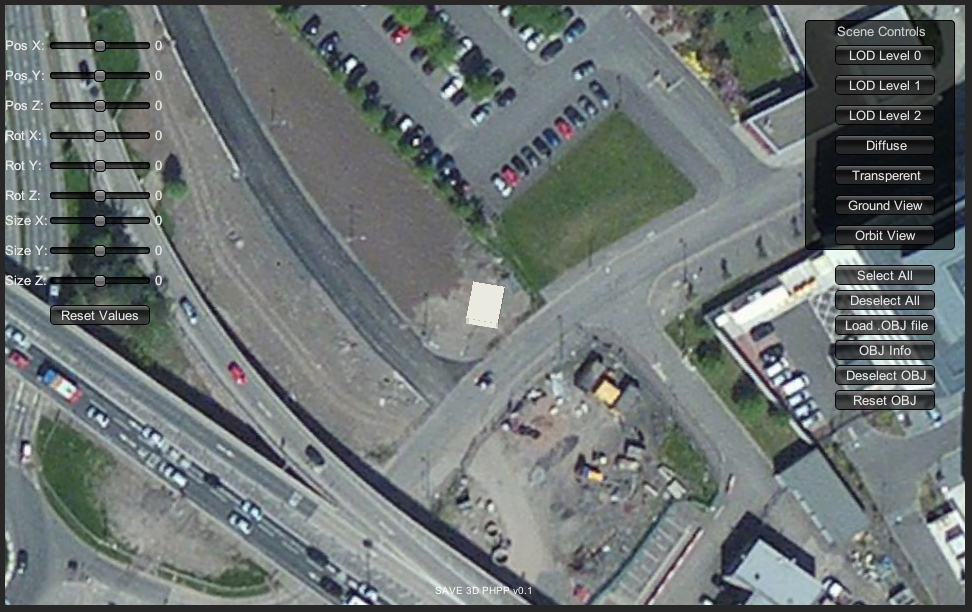
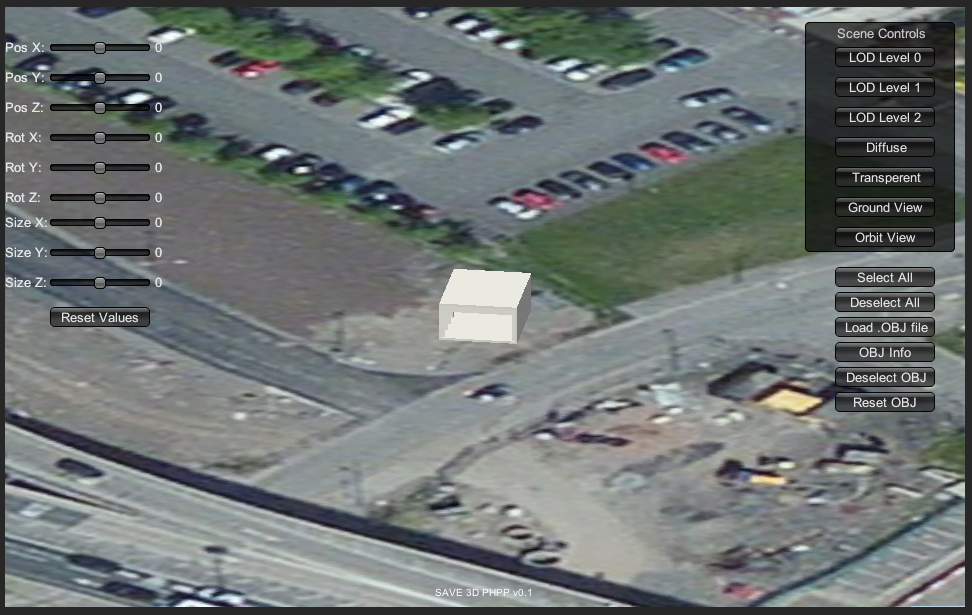
The 3D PHPP software tool prototype was developed for an SME specialising in low carbon housing, with the aim of influencing early design choices maximising energy efficiency. The tool was designed to be a quick calculation tool that uses BIM principals for visualisation and limited data exchange. The tool is based on Building Information Modelling (BIM) principals.
The core energy appraisal models in 3D PHPP are based on computation models from the Passive House Planning Package (PHPP), appropriate for early energy appraisal. 3D PHPP is able to compute both numerically and visually the estimated energy usage and solar gain for early stage building designs (corresponding to the Level of Detail (LOD) 100 BIM maturity levels specification).
The aim of the tool is to allow civil engineers and architects to quickly calculate energy appraisals for 3D mass model concepts of buildings in real-time 3D. The tool is able to instantly calculate key PHPP energy components and provide the user with a live interactive update. The 3D PHPP BIM tool was developed using Unity 3D. The 3D PHPP BIM tool is used as part of an editor interface extension within Unity 3D – much like an editor extension.
Calculation of net energy gains and losses is calculated on a per component basis, where the spatial and dimensional properties of each component can be adjusted in real time. Any real-time changes to the component are instantly reflected in the new calculated value. Additionally, 3D PHPP can convert IFC models to OBJ models – but only the geometry, as other attributes are omitted. The created components can be instanced as “prefabs” and stored to the local Unity asset database. These components can also be shared with other users who have Unity 3D and 3D PHPP.
The 3D PHPP tool prototype was developed as part of a TSB Innovation Voucher funded research project by Abertay University SAVE Group, with support from UrbahnStudios, Futurekomfort and Fife Collage .
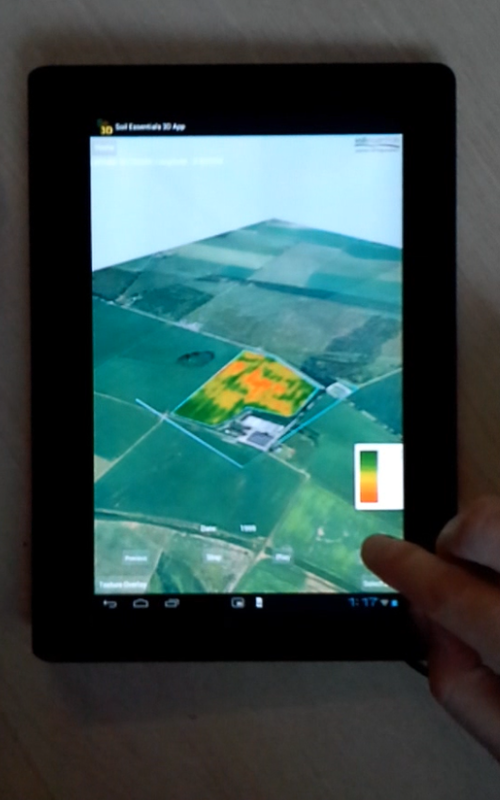
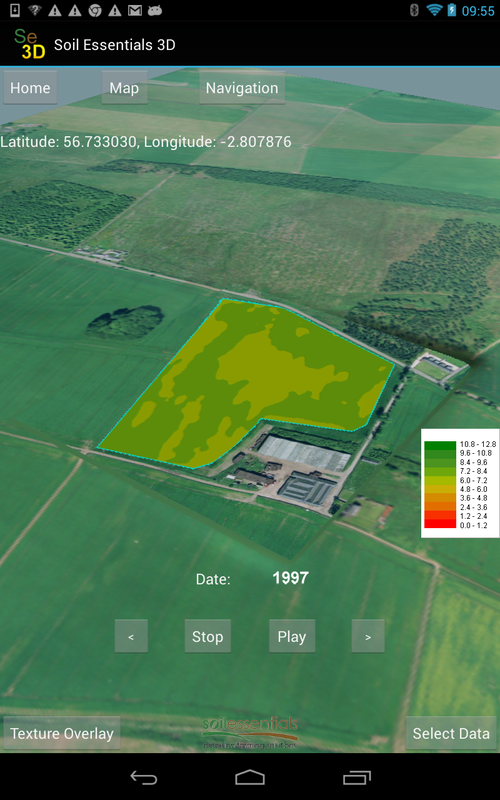
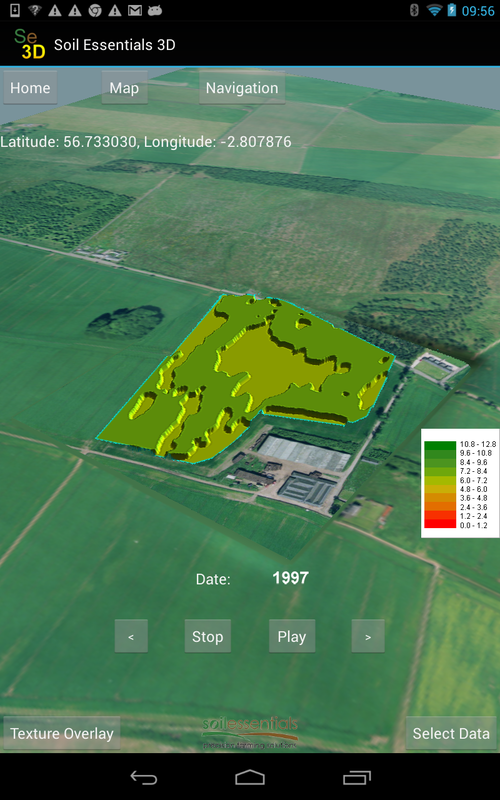
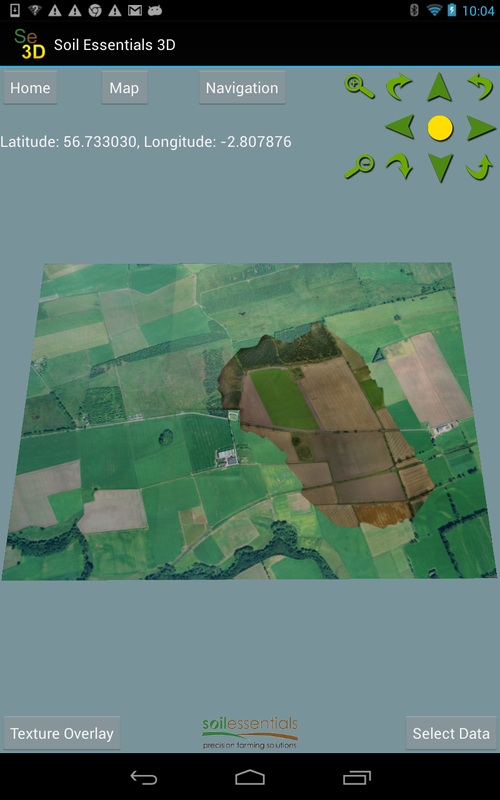
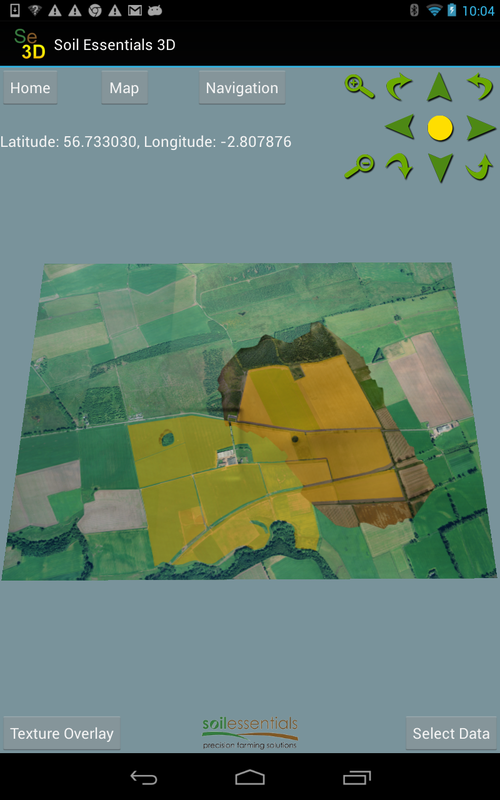
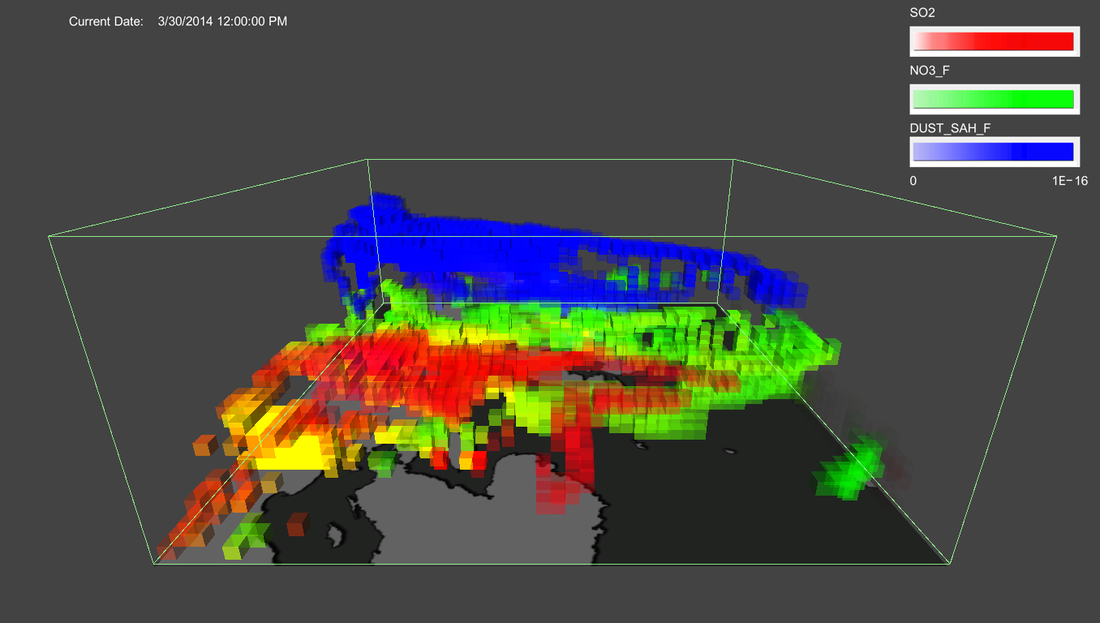
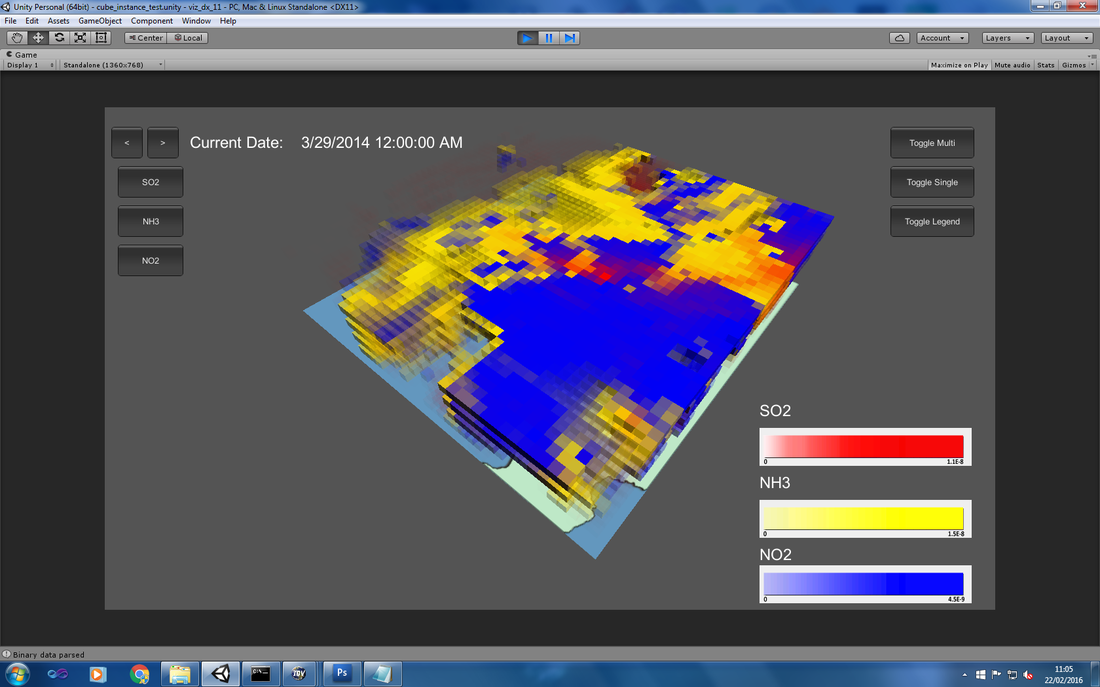
SE 3D Precision Agriculture Visualisation Android App (2015)
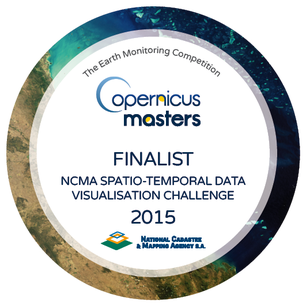
SE-3D is an interactive 3D decision support tool aimed at farmers and agronomists, developed as an Android app. SE-3D addresses the visualisation issues of precision agriculture by providing the user with an interactive 3D visualisation of a selected farm fields yield data. Within the interactive 3D view, the users are able to visualise time-series yield data obtained from collected field sample data. The users can then assess the condition of the selected fields yield output within a 3D visualisation context. The 3D visualisation context implements four different visualisation options - which include two aggregated data visualisation methods and two point yield data visualisation methods (based on yield point data that was processed offline using a selected block Kriging algorithm). The application makes use of the Google Maps API v2 in order to provide a wider location context display to the user in a separate map view window. Additionally, the developed project framework also has capabilities for streaming high resolution aerial photography data using virtual texturing methods. SE-3D was developed using OpenGL ES 2.0 and written in Java, using the Android Development Tools (ADT) SDK. SE 3D was developed by the Abertay University SAVE group in collaboration with an SME called Soil Essentials, who specialise in precision agriculture. The project was also selected as the finalist for the Copernicus Masters NCMA Spatio-Temporal Data Visualisation Challenge 2015 competition. The project was entered under the title: Interactive 3D Land Use Visualisation for Mobile Devices. Please see competition link for more details: http://www.copernicus-masters.com/index.php?kat=challenges.html&anzeige=ncma.html
|
|


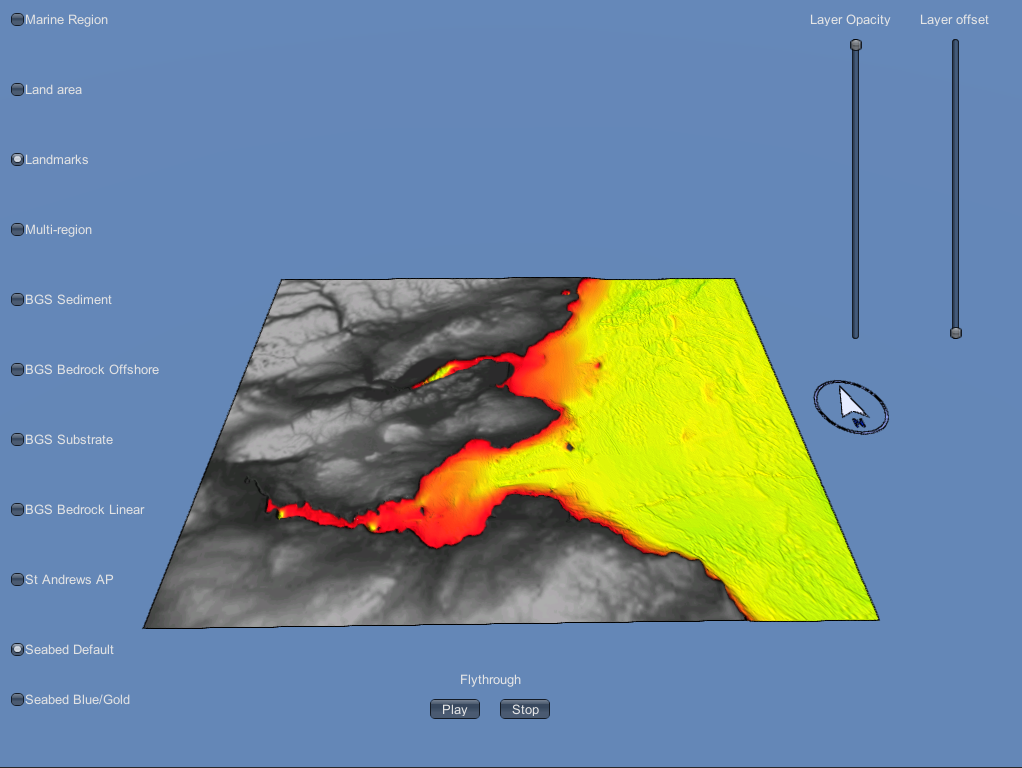
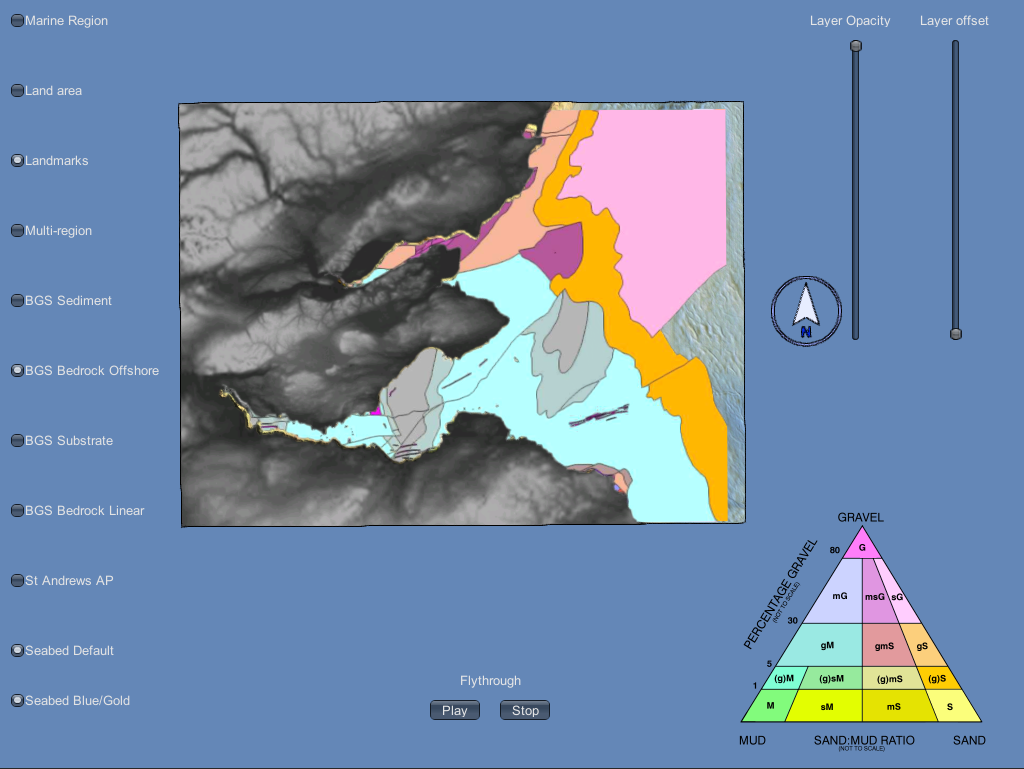
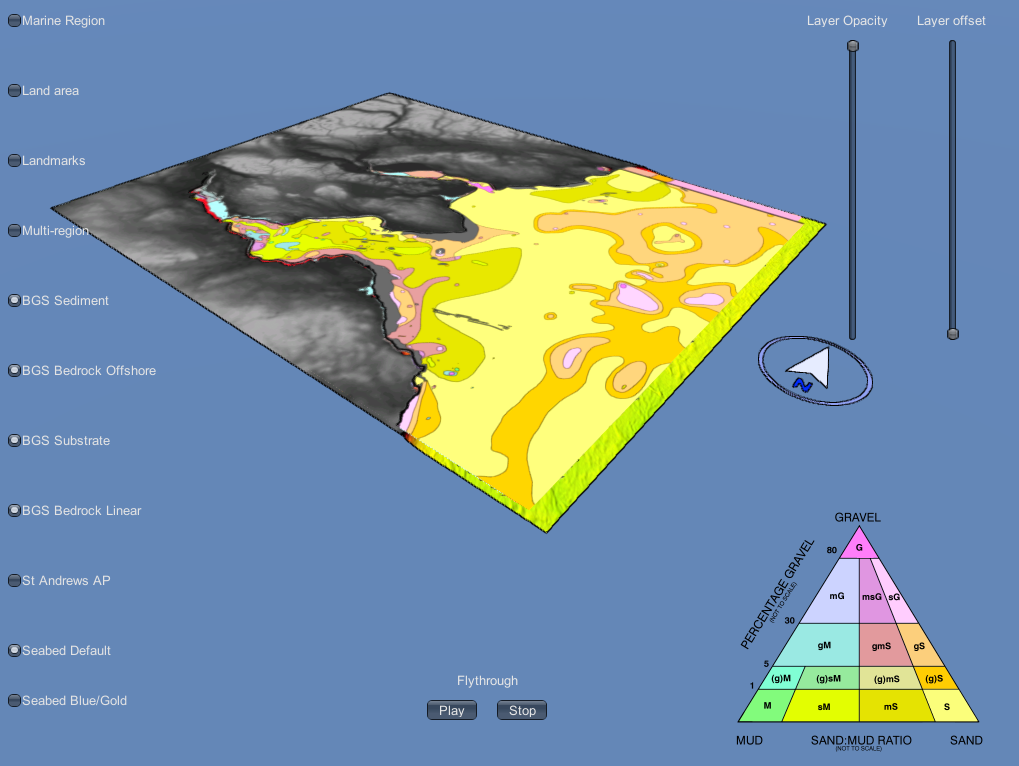
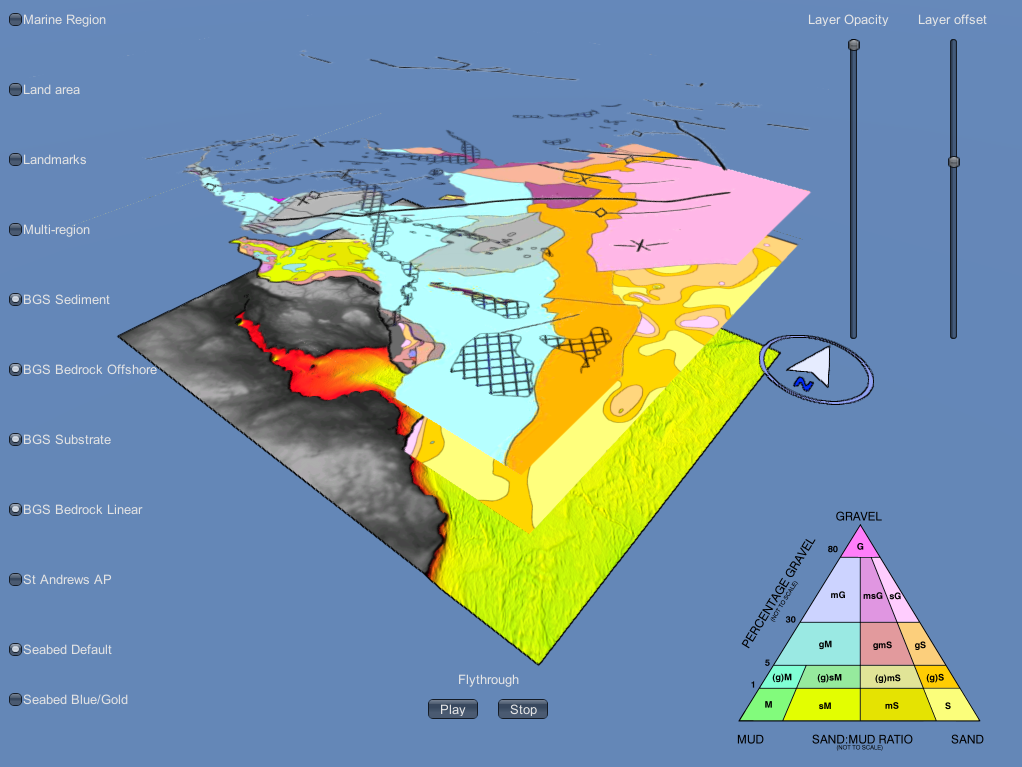
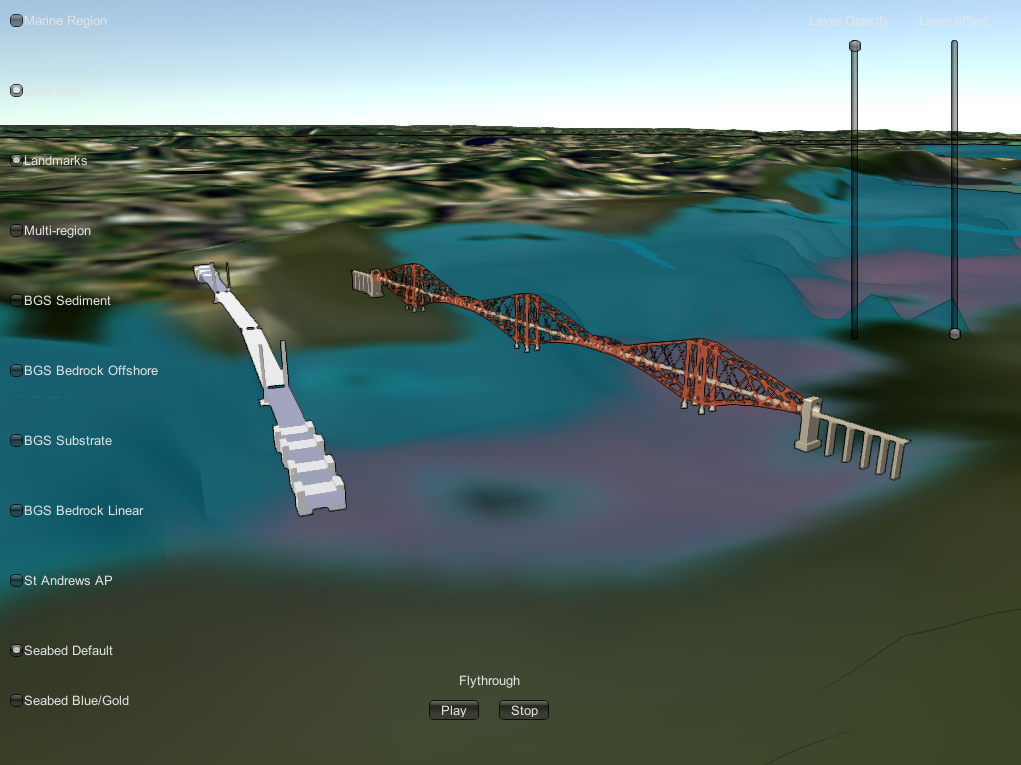
Also as one of my last projects at while working with the SAVE group at Abertay University, I worked on a 3D visualisation prototype for visualisation of seascape features and the associated seascape bathymetry model. TayScape is an interactive 3D Visualisation model of the Tay and Forth estuaries. The aim of the prototype was to act as a tool for helping to collect opinion and data for a stakeholder engagement policy making study. This project was completed as part of a collaboration between Abertay University and The University of St Andrews (working with Dr Tim Stojanovic). The outputs of the prototype application were presented at the Tay Estuary Forum 2016 Conference - (https://tayestuary.org.uk/tef/wp-content/uploads/sites/9/2014/04/TEF-Conference-Report-2016-FINAL.pdf).
Master's by Research (2016)
I have completed my Master’s by Research project in September 2016. My master’s project research investigated the design and implementation of methods for streaming high resolution aerial photography image data to a 3D visualisation scenario running on an Android mobile device. Specifically my research project addresses the problem of transferring and presenting high-resolution UAV drone imagery on mobile devices for in-field use by precision agriculture practitioners such as farmers and agronomists. The implemented streaming methods make use of HTTP long-polling and WebSockets streaming methods using a client/server model, with a particular focus for streaming in low-connectivity environment using a 3G/4G mobile network Internet connection.
An online copy of my master's by research thesis is available here: https://drive.google.com/file/d/0B5GvaWJc-yH9RHVOWkhlSE94eU0/view?usp=sharing
An online copy of my master's by research thesis is available here: https://drive.google.com/file/d/0B5GvaWJc-yH9RHVOWkhlSE94eU0/view?usp=sharing